Get ready for the STM32 Summit 2026 | Online, November 3
Join discussions in the Product Forums. Ask questions, learn from your peers, and share insights on ST solutions to accelerate your design journey.
Most recent activity
Hello,I'm working with an STM32MP257 and encountering unexpected behavior regarding RTC resource isolation between the Cortex-M33 (bare metal/HAL) and Cortex-A35 (OpenSTLinux).I performed a simple test where my Cortex-M33 requests the initialization resource using the Resource Manager and holds it while reading the time registers:ResMgr_Status_t st = ResMgr_Request(RESMGR_RESOURCE_RIF_RTC, RESMGR_RTC_INIT_RSC);if (st == RESMGR_STATUS_ACCESS_OK){// Reading registers directly while holding the lockuint32_t tr = RTC->TR; uint32_t dr = RTC->DR;// ... intentionally omitting ResMgr_Release to test the lock ...} While the M33 is actively holding this RESMGR_RTC_INIT_RSC lock, I execute the following command from the Linux shell on the A35 core:hwclock --set --date="2026-07-18 12:34:56" --utcTo my surprise, the time is successfully changed.My question is: why does this happen? Does the OpenSTLinux RTC driver (rtc-stm32.c) completely bypass the RIF synchronization mechanism and force its
Hi 👋I have implemented a simple program to send and receive characters over the USART device which works as expected when I connect my MCU up to minicom via usb as in I can see the characters sent by the program getting printed on the console and I can see the characters I type on minicom in the relevant variable in gdb.Next, I tried connecting the TX and RX pins together to have transmission and reception in loopback mode but that doesn’t seem to work. My program (which does both transmission and reception in simple polling mode) simply gets stuck on the RXNE != 1 loop and never exits that indicating that the RX pin either never receives any data or it never detects a start bit so it just remains at the idle state waiting for that. So, I’m wondering what the reason for this might be..could it be that minicom simply sends the right start bit sequence which the Receiver picks-up? Or something else..?The program in both cases is exactly the same so the only difference is that in loopbac
In later revisions of the stm32n657 datasheet the minimum Vbat has been changed from TBD to 3.0V. Can you shed some light on why 3.0V was chosen? It looks like everything that Vbat powers should theoretically work below 3V(in particular VSW is good down to 2V). The reason I’m asking is that if we follow the 3.0V to 3.6V window strictly there is not a good primary cell chemistry that matches that. Lithium manganese dioxide is too low of a voltage for most of the discharge curve. Lithium thionyl chloride would work well but a fresh cell will be a little above 3.6V.Is lithium thionyl chloride the intended chemistry? Chances are it would probably just work since it would be below the absolute max rating. Does ST have an intended backup supply architecture for Vbat other than applying a cell voltage directly to Vbat?
We are currently shifting from using CubeIDE to a Docker + VS-Code combo and this works great for compiling but debugging still has some challenges.On Linux it seems to work (for the colleagues I spoke to) but on Windows we still have some issues.Forwarding the ST-Lin USB port using usbipd works but as soon as I step away from my laptop to have a coffee break or lunch, things go wrong: The right LED blinks red/green when debugging or just red when I stop debugging as long as things work but after a break both LEDs are green and OpenOCD refuses to connect to the ST-Link with an “ Error: libusb_open() failed with LIBUSB_ERROR_NOT_FOUND” message.At that time, “usbipd list” still reports the ST-Link is attached to WSL/Docker and lsusb also shows the device being available in my docker container (and yes, this is in a terminal window in VS-Code)I can get it to run again most of the time by restarting the container and/or quiting/restarting VS-Code but that not always works.Rebooting the lap
Hello, I am using stm32f429zi for my project, I set timer 1 with 4 channels (channel 1 and 2 as input channel, and channel 3 is output channel). I would like to generate a pulse from channel 3 with low frequency and around 50% width to set a communication handshake signal to different control board. I set main frequency as 168MHz, so timer 1 APB2 is 168MHz. the setup is followed: TIM_ClockConfigTypeDef sClockSourceConfig = {0}; TIM_MasterConfigTypeDef sMasterConfig = {0}; TIM_IC_InitTypeDef sConfigIC = {0}; TIM_OC_InitTypeDef sConfigOC = {0}; htim1.Instance = TIM1; htim1.Init.Prescaler = 2099; htim1.Init.CounterMode = TIM_COUNTERMODE_UP; htim1.Init.Period = 65535; htim1.Init.ClockDivision = TIM_CLOCKDIVISION_DIV1; htim1.Init.RepetitionCounter = 0; htim1.Init.AutoReloadPreload = TIM_AUTORELOAD_PRELOAD_DISABLE; if (HAL_TIM_Base_Init(&htim1) != HAL_OK) { Error_Handler(); } sClockSourceConfig.ClockSource = TIM_CLOCKSOURCE_INTERNAL; if (HAL_TIM_ConfigClockSource(&
Hello, I bought a NUCLEO-F446RE Evaluation board last month. But it doesn’t work when I “RUN” or “DEBUG” in STM32CubeIDE2.1.1 environment . To solve this problem, I tried several methods supplied by GPT, I can list more information below:Firstly, my computer is a lenovo notebook with win11, the STM32CubeIDE version is 2.1.1, and STM32CubeProgrammer version is 2.23.0;Secondly, the device management can list the key information showed below when I connect NUCLEO-F446RE:Thirdly, the STM32CubeProgrammer can easily connect NUCLEO-F446RE, the figure of connecting status and log are showed below: However, after I closed STM32CubeProgrammer and open STM32CubeIDE, when I click “run” or “debug”, IDE cannot connect NUCLEO-F446RE, the problem figure showed as below: I feel puzzled on this issue, can you give some advice? Thanks.
Hello ST Support Team,I am currently working with SPC5 Studio 6.0 and facing issues with debugging my SPC560B50 project. The IDE fails to launch with the error message:"Error with command: gdb --version / Cannot run program 'gdb': Launching failed."I have verified that SPC5 Studio 6.0 does not include the arm-none-eabi-gdb.exe file in its installation directories. Could you please clarify: Does SPC5 Studio 6.0 require an external installation of the GNU ARM Embedded Toolchain to provide GDB? If so, which version of the toolchain is officially supported and recommended for SPC5 Studio 6.0? Are there specific configuration steps to correctly link SPC5 Studio 6.0 with the external GDB executable? Your guidance would be greatly appreciated, as this issue is blocking my ability to debug projects with SPC5 Studio.Thank you, Anand
I'm working on a touchscreen application and I'm looking into ways to protect the display surface from scratches and everyday wear.I'm curious whether anyone has tested a transparent protective film over an STM32-based capacitive touchscreen.In particular, I'd like to understand:Does the additional film thickness affect touch sensitivity? Can the adhesive layer interfere with capacitive touch detection? Does optical clarity remain good enough for a UI developed with TouchGFX? Are there recommended film materials or thicknesses for touchscreen applications? Could the film cause any issues with heat or long-term display performance?I'm mainly interested in practical experience from anyone who has tested protective films on embedded touchscreens.Has anyone tried this with an STM32 + TouchGFX project, and what were the results?
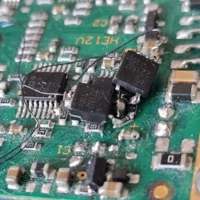
I'm trying to identify an STM8 microcontroller on a BLDC ceiling fan motor-driver PCB (JV2-Gorilla-2017 Atomberg fan appliance board, not an ST eval board), with the goal of confirming whether I can reprogram it via the exposed SWIM header.What I've confirmed so far:A 4-pad unpopulated header silkscreened SWIM / RST / 3V3 / GND Two TSSOP-20 ICs on the board (designators U3 and U4 in silkscreen) U4 shows a visible STMicroelectronics logo under magnification, but the part-number text beneath it is too worn/corroded to read reliably even after cleaning with isopropyl alcohol and raking light U3's top marking is fully illegible (possibly unbranded, possibly just more worn) Board also has a separate 8-pin SOIC gate-driver-looking IC, a 3-pin Hall-sensor connector, and a 3-phase MOSFET bridge under a heatsink — consistent with a BLDC commutation + speed-control boardQuestions:Given only a TSSOP-20 package and a genuine ST logo, is there a way to narrow down which STM8 family/part this likely
> Keywords (for search): STM32H7, H743, HardFault, black screen, startup crash, linker script, .ld, TLS, .tdata, .tbss, CubeMX, X-CUBE-AI, CubeIDE, GCC, arm-none-eabi## Symptom (check if this matches you)- Power-on: LCD **backlight on but screen stays black**; firmware seems to never start.- Debugger stops in `HardFault_Handler`; `CFSR = 0x400` (**IMPRECISERR**, imprecise bus error).- Backtrace stops in `Reset_Handler` (startup), **before `main()`**.- Often appears **right after regenerating with CubeMX** (e.g. after adding X-CUBE-AI).## How I traced it1. `CFSR = 0x400` → imprecise bus error = a write to an invalid address.2. `bt` → crashes in the startup `.bss` zero-fill loop (`str r3, [r2]`).3. Build map shows the four startup symbols are **not in the same memory region**:```_sdata = 0x24000000 (RAM / AXI SRAM)_edata = 0x20000000 (DTCM - BELOW _sdata!)_sbss = 0x20000000 (DTCM)_ebss = 0x240002FC (RAM / AXI SRAM)```→ the `.bss` zero-fill walks from DTCM (0x20000000) up to
So have an STM32H563 that I was trying to get to work with DFU. I read through the Docs and saw that for that to work I needed PRODUCT_STATE in Open with Boot Pin high or PRODUCT_STATE in Providing. I tested the first option and couldn’t get that working and so figured to test if the Boot Pin was the issue I set the PRODUCT_STATE to Providing. It still didn’t work, however the more important issue now is when I was trying to set it back to Open it wouldn’t let me do that. I then flailed a little and think I may have set the PRODUCT_STATE to Closed or Off or something and saved that. Now, I can’t get back into the chip at all. I get either this error: Or if I try it in Under Reset mode I get this error: So Im wondering, did I completely brick this chip, is there a way to check that, and if I didn’t, what can I do to get this to let me back in
Hello everyone,I'm developing a LoRaWAN end-device based on the STM32WL using the official ST LoRaWAN stack, and I'm facing a reproducible freeze that only happens with ChirpStack, not with TTN.EnvironmentMCU / Board: STM32WL55JC Stack: STM32Cube_FW_WL — APPLICATION V1.3.0, MW_LORAWAN V2.5.0, L2_SPEC V1.0.4, RP_SPEC RP002-1.0.1 Region: AU915 (sub-band 1, channels 0–7 + 64) Activation: OTAA, Class A, unconfirmed uplinks every 30 s Same hardware and same gateway used in both testsProblem On ChirpStack, after the join the device sends only 4–5 uplinks and then freezes permanently: it stops transmitting and never recovers. Current measurement shows the radio stuck at ~14 mA (looks like it stays in RX), while a normal TX peak is ~74 mA.Key observation The freeze always happens right after ChirpStack sends LinkADRReq commands. In my logs, ADR ramps the TX power (PWR 0 → 2 → 5 → 7) on consecutive uplinks, and the device locks up on a frame where both RX1 and RX2 time out. The device answers L
[PN]: STM32G431RB, custom motor-control board[VERSION]: MCSDK 6.4.1 Full, STM32CubeMX 6.15.0[TOOL]: Motor Control Workbench code generator / MC firmware[TYPE]: Enhancement request / generated-code consistency issue[DETAILS]The generated project contains motor and drive parameters in:- pmsm_motor_parameters.h- drive_parameters.h- power_stage_parameters.h- parameters_conversion.hMost runtime configuration correctly uses these macros or derived macros.However, mc_configuration_registers.c duplicates several motor parameters as numeric literals in ApplicationConfig_reg_t and MotorConfig_reg_t, even though this file already includes parameters_conversion.h.Examples from one generated project:- maxMechanicalSpeed = 15900 duplicates MOTOR_MAX_SPEED_RPM / MAX_APPLICATION_SPEED_RPM- nominalCurrent = 0.68 duplicates NOMINAL_CURRENT_A- nominalVoltage = 24 duplicates NOMINAL_BUS_VOLTAGE_V- polePairs = 1 duplicates POLE_PAIR_NUM- ratedFlux = 0.8 duplicates MOTOR_VOLTAGE_CONSTANT- rs = 3.16 du
Hi,We are planning to use SIL2 certified controllers in one of our design. Below are few queries from my end which i request your supportFrom details available in internet, i came to know that no standalone controllers with SIL2 certified. Is that correct? STM provides Safety SW packages to achieve SIL2 & SIL3. Is that correct? Which series of controllers STM recommends to use along with Safety SW to achieve SIL2 or 3? We planned to use STM32U series? Will that be fine along with Safety SW package? Is the safety SW packages are open source (Free to use) or need to be paid? If any series STM recommends to use; i need evaluation boards and links where i can order from ThanksArfaj
I have two concurrent UART DMA RX running in STM32l431. UART2 is running all the time and UART3 is started when a command is sent and waiting for data. Both of them works, but when I try to make a new DMA transfer on one of them the other stops which I do not want. Why does this happens? Here is the initiation:DMA_HandleTypeDef hdma_rx2;DMA_HandleTypeDef hdma_rx3;DMA_HandleTypeDef hdma_lrx1;DMA_InitTypeDef DMA_InitStructure;void HW_DMA_Init(){ __HAL_RCC_DMA1_FORCE_RESET(); __HAL_RCC_DMA1_RELEASE_RESET(); __HAL_RCC_DMA1_CLK_ENABLE(); __HAL_RCC_DMA2_FORCE_RESET(); __HAL_RCC_DMA2_RELEASE_RESET(); __HAL_RCC_DMA2_CLK_ENABLE(); currentDMABufferWrite = 1; currentDMABufferRead = 0; dmaLen1 = 0; dmaLen2 = 0; dmaHasData1 = false; dmaHasData2 = false; /* Configure the DMA handler for reception process */ hdma_rx2.Instance = DMA1_Channel6; hdma_rx2.Init.Direction = DMA_PERIPH_TO_MEMORY; hdma_rx2.Init.PeriphInc = DMA_PINC_DISABLE; hdma_rx2.Init.MemInc
Hello, I am wondering what is the memory interface of the embedded 2MB flash? Like is it SPI .etc Thank you!
Hello everyone,I am encountering errors when running Semantic Segmentation, Object Detection, and Pose Estimation models on my STM32N6570-DK board using STM32 Model Zoo Services. Here are the details of my setup and the errors I am facing:Hardware and Versions:Board: STM32N6570-DKModels: Semantic Segmentation, Object Detection, Pose EstimationTools: STM32Cube.AI 4.0.0, GCC 14.3.1, HAL 1.3.0, STMCubeIDE 2.1.1I followed the README instructions from the STM32 Model Zoo Services repository to test the mentioned models. I compiled and flashed the firmware onto the STM32N6570-DK board.Errors Encountered: plaintextCopyBus interface interrupt BUSIF0 ERR: 0x0 BUSIF1 ERR: 0x20 Epoch Controller ERROR interrupt: EC_IRQ = 0x0000000a Epoch Controller opcode counter: 0x00000000 Epoch Controller label: 0x00000000 ATON_STD_IRQHandler()@871: irqs=0xlx assertion "0" failed: file "[...]/stm32ai-modelzoo-services/application_code/.../ll_aton_runtime.c", line 875, function: __LL_ATON_RT_IrqErr&nb
I am doing a project on STM32F479ZGT6. I set all my pins to HIGH default, open drain, external pull up on STMCubeMX. During power on, the IO pins first follows 3.3V by the external pull up, but then two of the IO pins becomes LOW during reset release, and then after reset is completely released, it turns back to HIGH(default logic set in STMCubeMX). Does STM32 has the ability to change logic opposite from the default logic only for a moment?(which in my case is during reset release) Would be glad to know any possible cause and solution for this case.Red: ResetBlue &Green: IO pin
hey i am struggling to flash by custom onnx model on stm32N6570-DK . I tired using the stm32 cube ai cloud website but it only gives me option to generate c code and not a project or elf file . So i shifted to stm32cube Ai studio but it keeps me throwing this error - (*) 'input'/'output' buffers are allocated in the activations bufferRunning the ONNX model...Running the ST.AI c-model (AI RUNNER)...(name=network, mode=TARGET)E200(ValidationError): TARGET: Unable to bind the ST.AI runtime with "network" c-model: [] E801(HwIOError): Invalid firmware - COM3:115200 can anyone help me to get started with the same
Hi ST Community, I am trying to deploy a YOLO-FastestV2 INT8 object detection model on the STM32N6570-DK. The model is successfully converted and runs on the board, but I am facing issues with the detection results.Model InformationModel: YOLO-FastestV2 (INT8) Number of classes: 6 Parameters: 235,120Model InputInput_0_out_0uint8 [1,1,320,320]Model OutputsQuantize_297_out_0int8 [1,12,20,20]Quantize_313_out_0int8 [1,3,20,20]Quantize_311_out_0int8 [1,6,20,20]Quantize_330_out_0int8 [1,12,10,10]Quantize_346_out_0int8 [1,3,10,10]Quantize_344_out_0int8 [1,6,10,10]Issues I am FacingThe bounding boxes are not displayed at the correct positions on the camera image. The detected bounding boxes appear to be shifted or incorrectly scaled. Even when the camera is not viewing any object (or the camera feed is unclear), random bounding boxes continue to be displayed. These false detection remain on the screen even though there should be no valid detection.Verification PerformedI also tested the quanti
Hi,I am working on a project using STM32H743ZITx and trying to deploy an ONNX model using X-CUBE-AI.My .ld file was doing just fine until I add the X-CUBE-AI in the middleware. It will split the BSS range across DTCMRAM and AXI‑RAM. The startup file’s BSS‑zeroing logic accesses invalid non‑hardware‑backed addresses between the two RAM regions and results in a HardFault right after Reset_Handler.My configuration is:MCU: STM32H743ZITx STM32CubeMX: 6.18.0 STM32Cube FW_H7: 1.13.0 STM32CubeIDE for Visual Studio Code: 3.9.0 Enabled X‑CUBE‑AI 10.2.1Files before and after the configuration of X-CUBE-AI are attached.
Hi all,i have a small question about Validation of a trained model.Atm i only work on PC with NEAI Studio Version 5.1.1.I used only data out of a *.csv fileI trained (benchmark) the model with around 170 Lines and 16 axis to get an accuracy of ~97%.I then validated the library with some test data with same axis count and data preparation. The learning file has the minimum amount of lines as suggested from the benchmark, i tried more lines with same result.The validation shows that even good data is treated as abnomaly so i only get an accuracy of max. 50%.Are there any hints what i am doing wrong? Many thanks in advance for answers.BR’sMartin
I am trying to generate a program a run using STM32Cube AI Studio and the STM32N6570-Dev Kit, but am running into an issue with the run failing due to a resource busy or locked (the .cproject). Some steps I’ve already taken:Closed all other STM programs (IDE, Programmer, MX) Completely deleted and made a new project Confirmed all ST programs (IDE, Programmer, MX) are up to date by cleaning and re-installing from ST website Confirmed all ST programs are linked to the AI Studio and confirmed they’re all downloaded in their default location. Restarted my PC.Notes:I am on Windows 11, Version 10.0.26200 Build 26200 Model = ST YOLO-X Nano - Person Detection. Source: Pre-trained model from ST Model Zoo Path: stm32ai-modelzoo/object_detection/st_yoloxn/ST_pretrainedmodel_public_dataset/coco_2017_person/st_yoloxn_d033_w025_256/
Hi ST Community,I have a question while reading the reference manual RM0440.On page 915, Figure 232 shows a timing diagram where the event is labeled "Reset on CMP2". However, looking closely at the waveform, the HRTIM_CHx2 output seems to be reset at CMP4, rather than at CMP2 as the text implies.Could anyone help clarify this? Is this a typo in the manual, or is there a specific HRTIM mechanism/priority that causes the reset to actually happen at CMP4 in this scenario?Any explanations would be greatly appreciated. Thanks in advance!
Hi, I ordered on rs-online memory M24M02E-UFMN6TP. The memory that I received has SMD marking 24M02FU (photo: https://ibb.co/gLCbX0vb). I was unable to lookup this marking on the st.com web nor in the M24M02E datasheet. The rs-online vendor also don’t know :). Can anybody verify that it’s the M24M02E, i.e. memory with the following datasheet: https://www.st.com/resource/en/datasheet/m24m02e-u.pdf ? I need 2 MBit, up to 5 ms write. IMHO the suffix 'E' distinguishes the 5 ms memories from the 10 ms and I need to be sure it’s the 5 ms version of the memory. Thanks.
Already have an account? Login
Enter your E-mail address. We'll send you an e-mail with instructions to reset your password.