This article provides a detailed guide on using VS Code to debug code running from external serial flash on the STM32N6. It covers setting up the development environment, setting up the project with CMake, configuring the debugger within VS Code, and validating the setup.
To debug code running from external serial flash effectively, the external memory must be configured in memory-mapped mode. The first stage bootloader (FSBL), running from AXI-SRAM2, initializes the XSPI interface, enables memory-mapped mode, and jumps to the application stored in external flash. Debugging starts with placing the debugger program on this external memory, allowing seamless execution and inspection directly from flash.
A key limitation to be aware of is that breakpoints cannot be set in application code located in external memory before the FSBL configures the memory mapping. Once the FSBL completes this setup and the debugger enters debug mode, breakpoints function normally. This guide covers environment setup, debugger configuration, project setup with CMake, and tips to work around these constraints for an efficient debugging workflow in VS Code. For a deeper look at this constraint and the available workarounds, see our dedicated article, How to manage breakpoints in external memory on STM32N6 | Community.
1. Prerequisites
This article requires that you have the following installed:
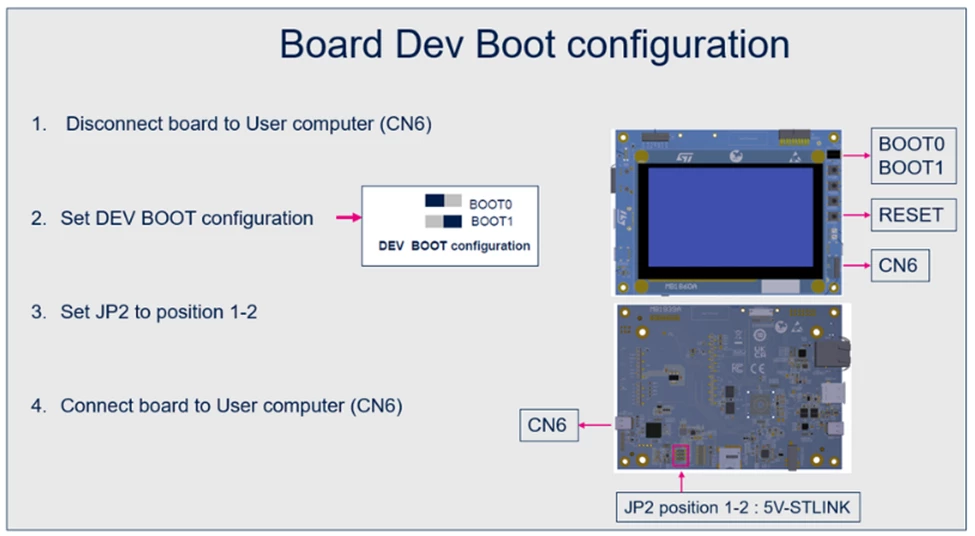
The hardware used to showcase is the STM32N6570-DK. Make sure that you have it in DEV boot mode to program the code.
3. Create an STM32N6 CMake project
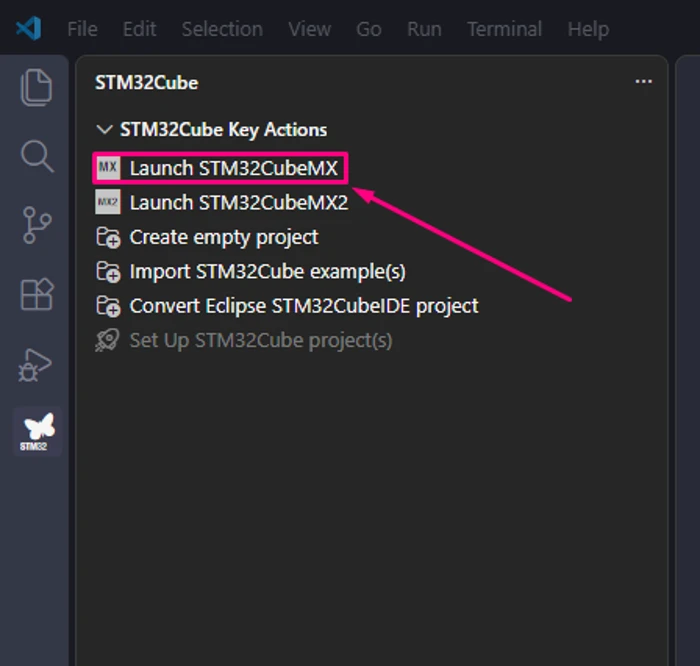
Create a new STM32CubeMX project, open VS Code, and click on [Launch STM32CubeMX]:
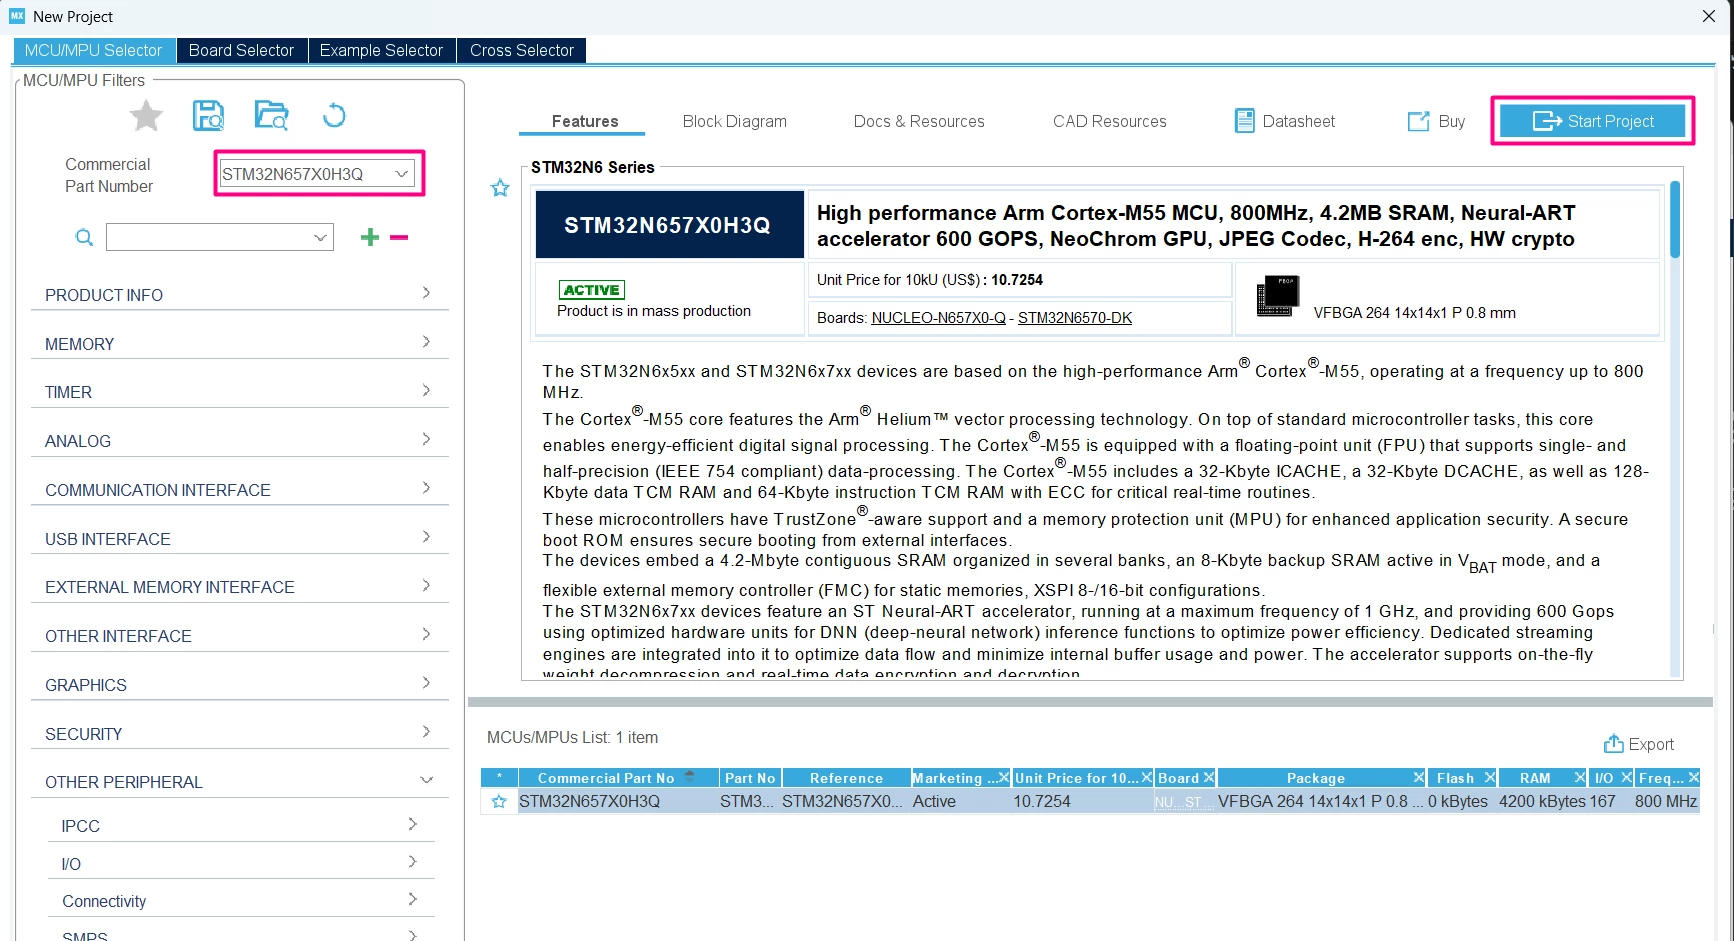
Select the [STM32N657X0H3Q]:
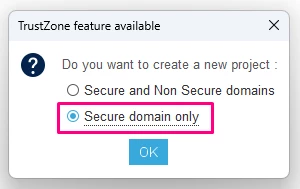
Select [Secure domain only]:
Configure the project to execute code from the external serial NOR flash. If you need assistance with this setup, we have published an article that explains the process in detail. You can find it here: How to execute code from the external serial NOR using the STM32N6.
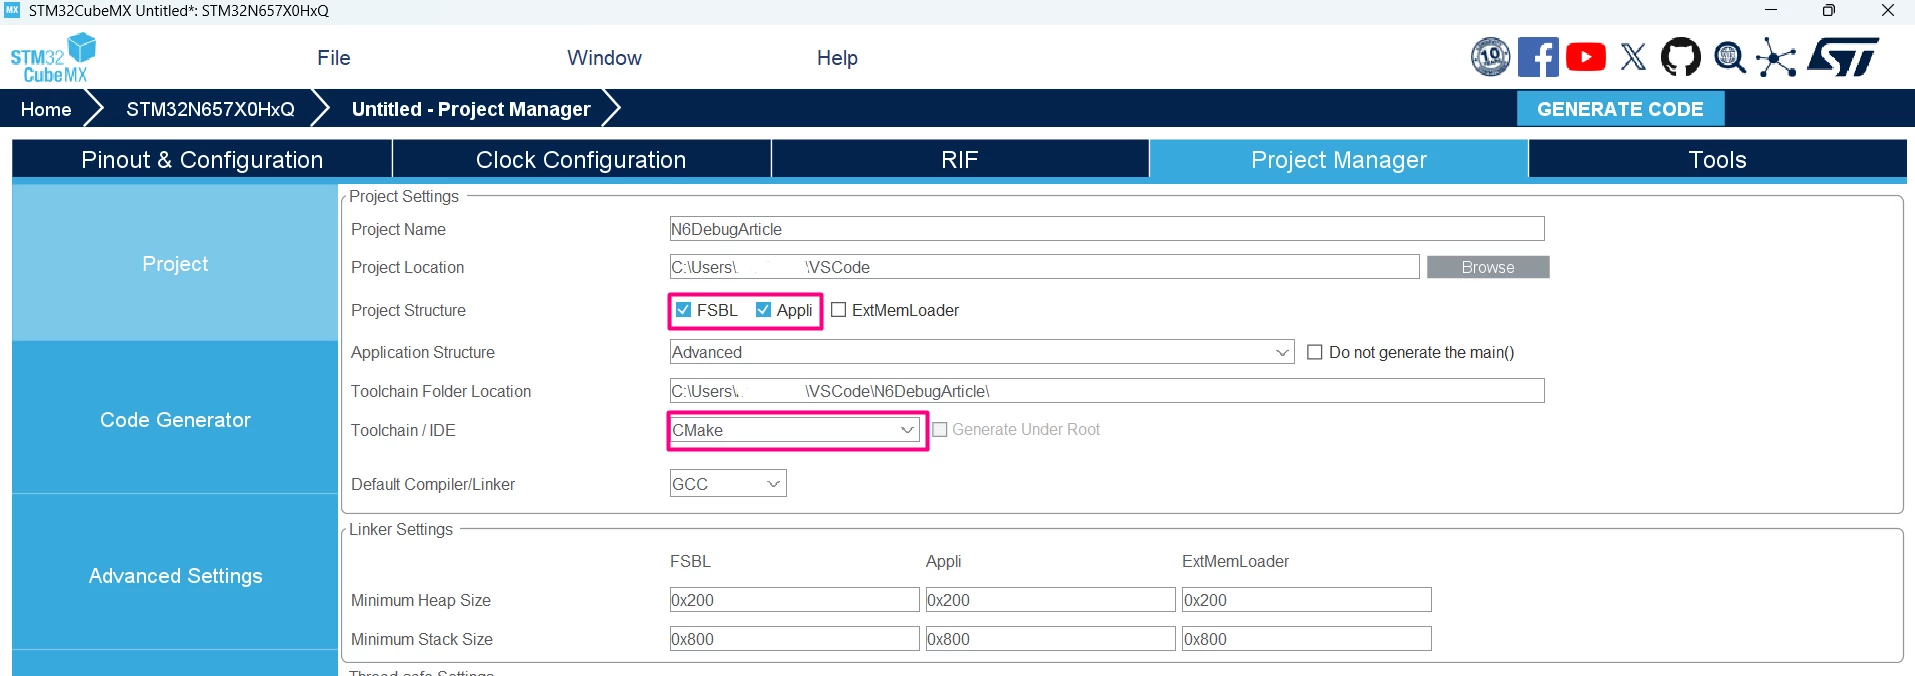
Before the code generation, select the CMake toolchain:
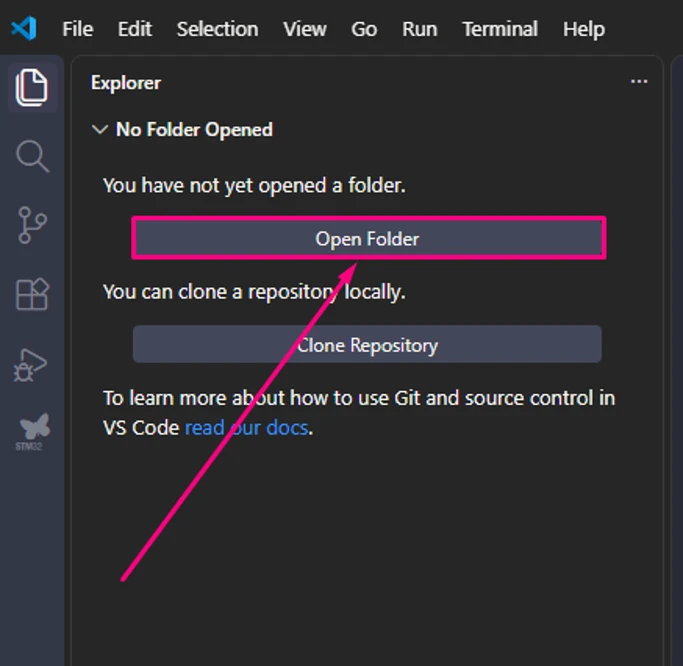
In VS Code, import the project folder:
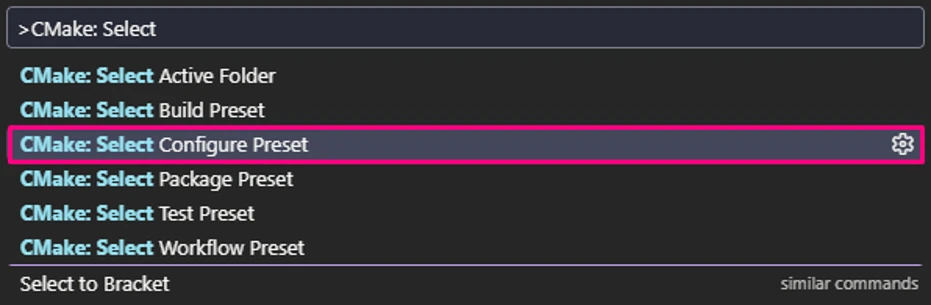
Configure the preset [Debug] by pressing Ctrl+Shift+P and type/select [Select Configure Preset] then click on [Debug]:
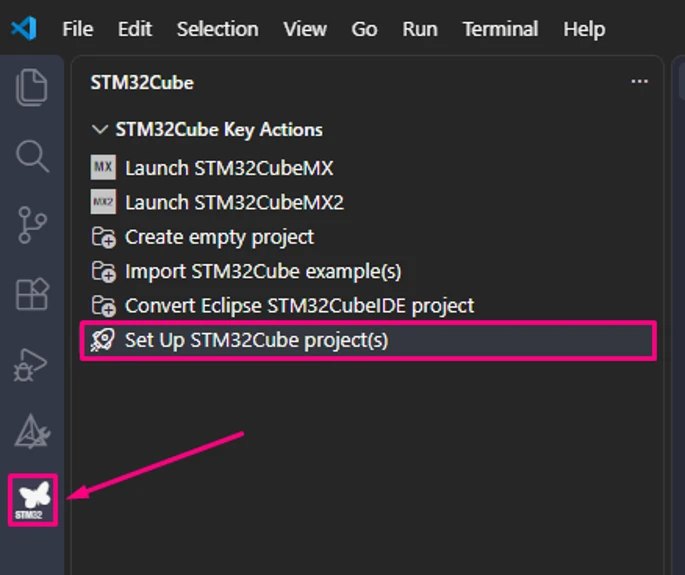
Configure CMake discovered Project as STM32Cube Project:
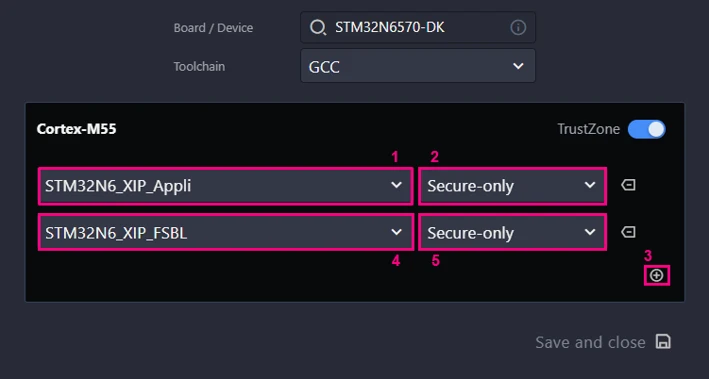
Add [PROJECT_NAME_Appli] and [PROJECT_NAME_FSBL] to your environment, save and close:
4. Code editing and post build commands
In the [Appli] project, locate the main.c file and add the toggle LED function call in its main loop:
  /* Infinite loop */
  /* USER CODE BEGIN WHILE */
  while (1)
  {
    /* USER CODE END WHILE */
    HAL_GPIO_TogglePin(GREEN_LED_GPIO_Port, GREEN_LED_Pin);
    HAL_Delay(200);
    /* USER CODE BEGIN 3 */
  }
  /* USER CODE END 3 */
}
As described here, it is possible to add post-build steps to generate the *.bin files and sign the binaries for both projects. However, some debugging extensions used in VS Code only support .elf files for debug image loading.
Because of that, even though the trusted binaries are generated in .bin format, it is useful to convert them back into .elf files as part of the build process. This allows the trusted image to remain compatible with tools and debug extensions that expect an ELF input while still preserving the signed binary payload.
To address this, a custom post-build command can be added to convert the signed .bin file back into an .elf file at the correct target address.
Example for the [Appli] image:
# Convert the signed Appli .bin back to .elf
add_custom_command(
TARGET ${CMAKE_PROJECT_NAME}
POST_BUILD
COMMAND ${CMAKE_OBJCOPY} -I binary -O elf32-littlearm -B arm --change-addresses=0x70100000 ${APPLI_OUTPUT} ${CMAKE_BINARY_DIR}/Appli-trusted.elf
COMMENT "Converting signed .bin back to .elf in address [0x70100000]"
)
This custom command takes the signed .bin output and repackages it into an .elf file, assigning it the proper load address, in this case 0x70100000 for the [Appli] image.
The result is a trusted ELF image that can be used by debugging tools that require ELF files, while still matching the signed binary content expected by the boot flow.
In short, the post-build flow becomes:
build the original project ELF
convert the ELF into a raw .bin file
sign the .bin file to generate the trusted binary
convert the signed trusted .bin back into an .elf file for debug tool compatibility
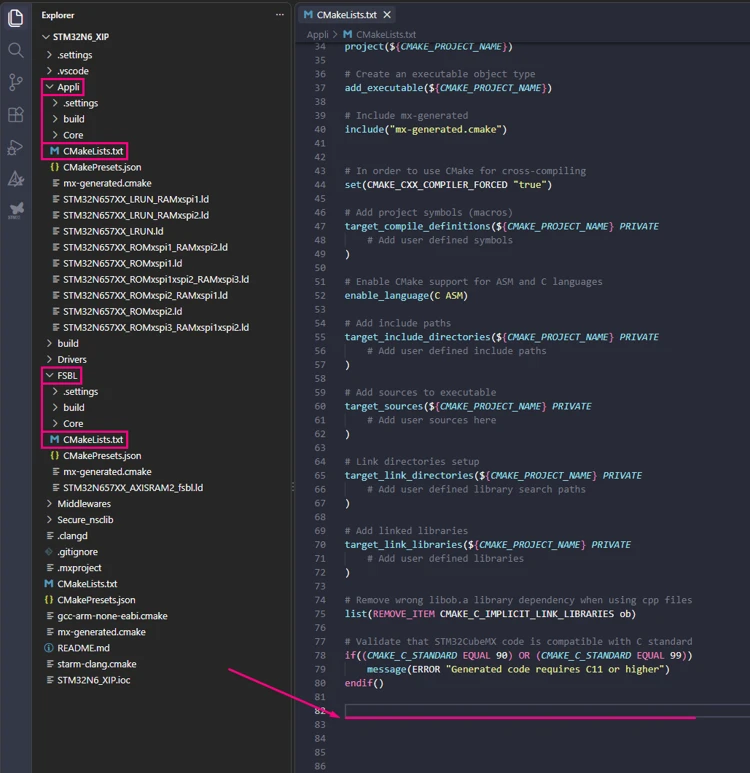
The same principle applies to both the [FSBL] and [Appli] projects, so equivalent post-build commands should be added to both CMakeLists.txt files.
4.1 Edit the FSBL post build
Starting from STM32CubeProgrammer version 2.21.0 a new parameter is needed "-align". Please make sure you use the updated command, as follows:
# Define the paths to the STM32 Signing Tool and the input/output files set(SIGNING_TOOL "C:/Program Files/STMicroelectronics/STM32Cube/STM32CubeProgrammer/bin/STM32_SigningTool_CLI.exe")
# Define the input and output files for FSBL set(FSBL_INPUT "${CMAKE_BINARY_DIR}/${CMAKE_PROJECT_NAME}.bin") set(FSBL_OUTPUT "${CMAKE_BINARY_DIR}/FSBL-trusted.bin")
# Convert the signed FSBL .bin back to .elf add_custom_command( TARGET ${CMAKE_PROJECT_NAME} POST_BUILD COMMAND ${CMAKE_OBJCOPY} -I binary -O elf32-littlearm -B arm --change-addresses=0x70000000 ${FSBL_OUTPUT} ${CMAKE_BINARY_DIR}/FSBL-trusted.elf COMMENT "Converting signed FSBL .bin back to .elf in address [0x70000000]" )
4.2 Edit the Appli post build
Starting from STM32CubeProgrammer version 2.21.0 a new parameter is needed "-align". Please make sure you use the updated command, as follows:
# Define the paths to the STM32 Signing Tool and the input/output files set(SIGNING_TOOL "C:/Program Files/STMicroelectronics/STM32Cube/STM32CubeProgrammer/bin/STM32_SigningTool_CLI.exe") # Define the input and output files for Appli set(APPLI_INPUT "${CMAKE_BINARY_DIR}/${CMAKE_PROJECT_NAME}.bin") set(APPLI_OUTPUT "${CMAKE_BINARY_DIR}/Appli-trusted.bin")
# Add a post-build step to sign the Appli binary add_custom_command( TARGET ${CMAKE_PROJECT_NAME} POST_BUILD # Step 1: Create a file with 'y' COMMAND ${CMAKE_COMMAND} -E echo y > "${CMAKE_BINARY_DIR}/input.txt" # Step 2: Run the signing tool, redirecting input from the file COMMAND "${SIGNING_TOOL}" -bin "${APPLI_INPUT}" -nk -of 0x80000000 -t fsbl -o "${APPLI_OUTPUT}" -hv 2.3 -align -dump "${APPLI_OUTPUT}" < "${CMAKE_BINARY_DIR}/input.txt" WORKING_DIRECTORY "${CMAKE_BINARY_DIR}" COMMENT "Signing Appli binary: ${APPLI_INPUT} -> ${APPLI_OUTPUT}" )
# Convert the signed Appli .bin back to .elf add_custom_command( TARGET ${CMAKE_PROJECT_NAME} POST_BUILD COMMAND ${CMAKE_OBJCOPY} -I binary -O elf32-littlearm -B arm --change-addresses=0x70100000 ${APPLI_OUTPUT} ${CMAKE_BINARY_DIR}/Appli-trusted.elf COMMENT "Converting signed .bin back to .elf in address [0x70100000]" )
4.3 Linker script for execute in place (XIP)
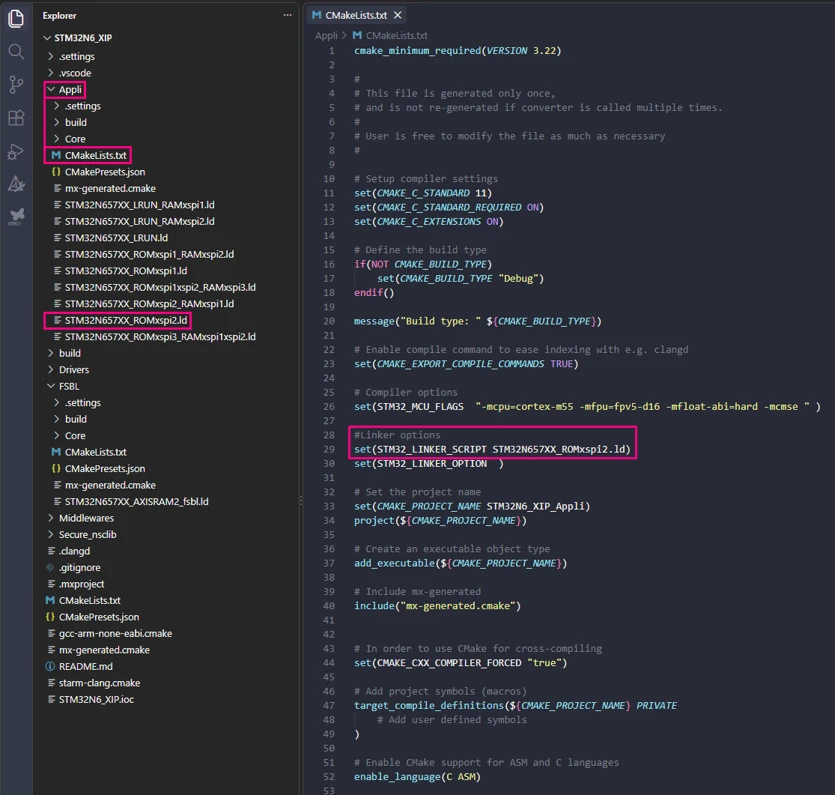
The default linker script generated by the CMake for the [Appli] project is configured for the selected operation configured in the STM32CubeMX’s EXTMEM_MANAGER, where the selected was XIP. Double check that the linker script used in [Appli] CMakeLists.txt is indeed the correct one:
Note: STM32CubeMX version 6.15 has a minor bug on the linker script creation for CMake that causes a build error on VS Code. I recommend changing the content of said linker script with the equivalent one available in our GitHub here or use the attached on in this article (available at the end of the article.)
5. Build the project
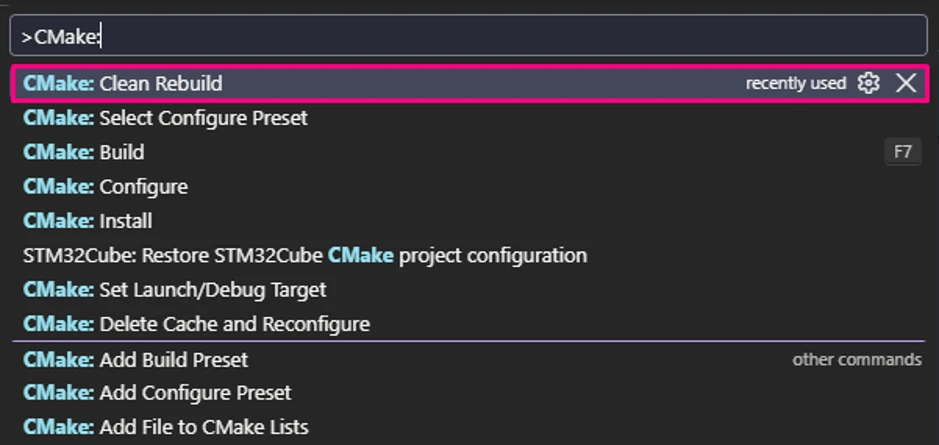
Now that all steps are configured, it is time to build the application,press Ctrl+Shift+P and then type/click [CMake: Clean Rebuild] for a clean and rebuild action.
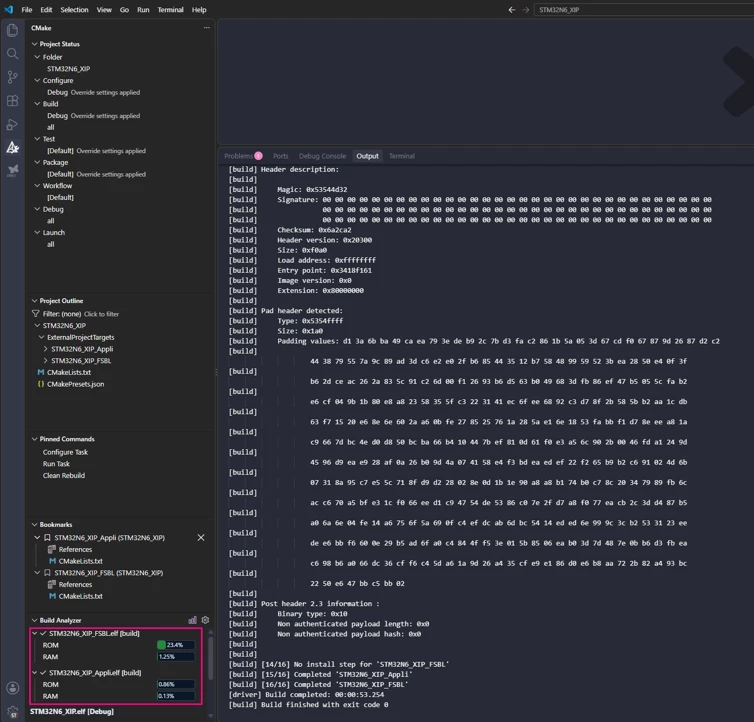
You should see something similar to the following in the Build Analyzer (lower left corner) and Build Output window:
6. Create and modify the launch.json file
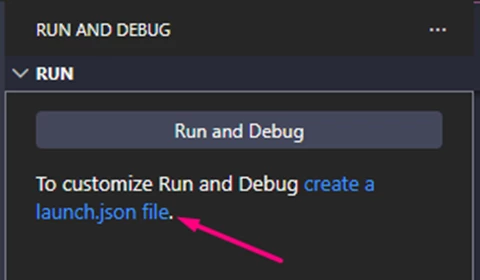
Open the Run and Debug view (Ctrl+Shift+D).
Click create a launch.json file.
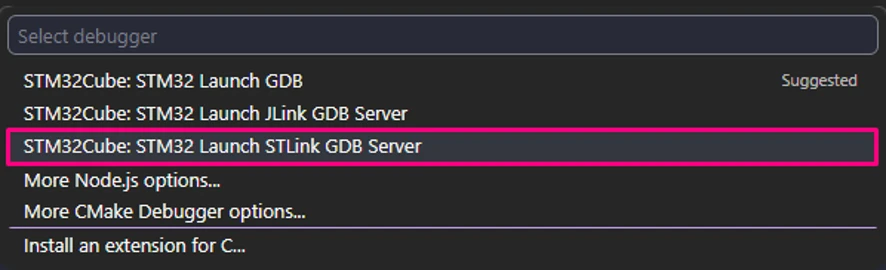
The current recommended pipeline is to use the STM32CubeIDE extension for STM32N6 XIP debug sessions.
Edit the generated launch.json to support debugging with all features enabled.
This selects ST-LINK GDB target as the debug adapter.
It means VS Code will use the debugger integration rather than a generic GDB configuration, which is important for STM32-specific features such as board support, flash access, and the ST-LINK debug workflow.
request: launch
This starts a new debug session on the target rather than attaching to an already running program.
In this workflow, the debugger is responsible for launching the session from the FSBL and preparing the target for XIP debugging.
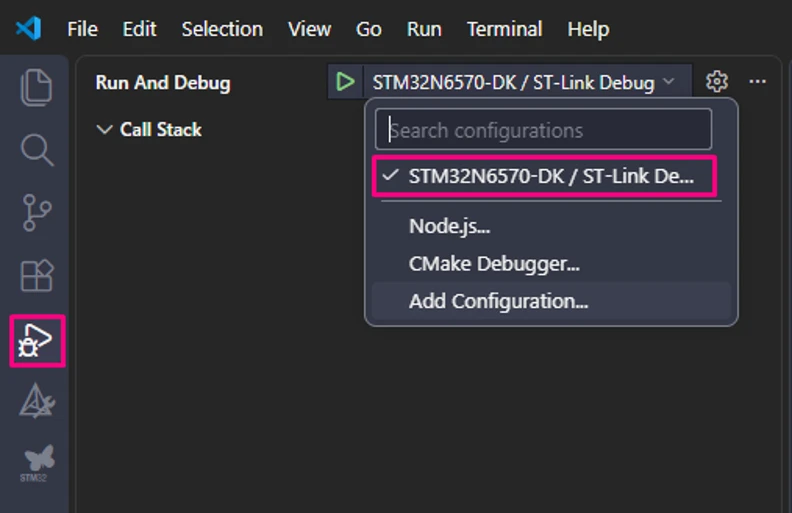
name: "STM32N6570-DK / ST-Link Debug"
This is the label shown in the VS Code debug configuration list. The name clearly identifies both:
the board: STM32N6570-DK
the debug interface: ST-Link This makes the profile easy to recognize when multiple configurations exist.
cwd: ${workspaceFolder}
This sets the current working directory for the debug session to the root of the opened workspace. Any relative paths used by the launch configuration are resolved from this folder, which keeps the setup portable across machines.
This tells VS Code to run the build command before starting the debug session. It ensures the binaries are up to date and that the ELF files required by the debugger are generated before launch.
deviceCore: "Cortex-M55"
This specifies the CPU core of the target device. The STM32N6570-DK uses a Cortex-M55, so this setting allows the debugger to initialize the correct core context and use the appropriate low-level debug behavior.
imagesAndSymbols
This section lists the ELF files used by the session. It combines the FSBL and the Application image and symbols in one configuration.
STM32N6_XIP_Appli.elf This is the application ELF stored in external flash. It is used so the debugger can resolve application symbols and provide source-level debugging once execution reaches the XIP code.
STM32N6_XIP_FSBL.elf This is the FSBL ELF, which acts as the first executable after reset. The FSBL initializes the external memory interface and enables memory-mapped mode, so debugging must start from it.
The presence of both ELFs allows the session to start from the FSBL and still display symbols for the XIP application later. However, these ELF files are used only for the debug session; the trusted binaries must still be flashed separately because they are the persistent images required by the boot flow.
serverExtLoader
This section defines the external flash loader used by the ST-LINK GDB server.
This points to the .stldr file required to access the external serial flash on the STM32N6570-DK. The debugger needs this loader to correctly read, program, and interact with the XIP storage device.
initialize: false
This means the external loader is provided to the debug server, but it is not explicitly initialized in a separate step from this configuration. In practice, the loader is available so the debug infrastructure can use it when needed to access external flash.
7. Create and modify tasks.json
Although the debug session uses the FSBL ELF and the application ELF for image and symbols, the trusted signed binaries must still be programmed into the device before debugging.
This is important because the trusted binaries are the images actually required by the STM32N6570-DK secure boot flow and by other boot modes beyond the current debug session.
In this workflow:
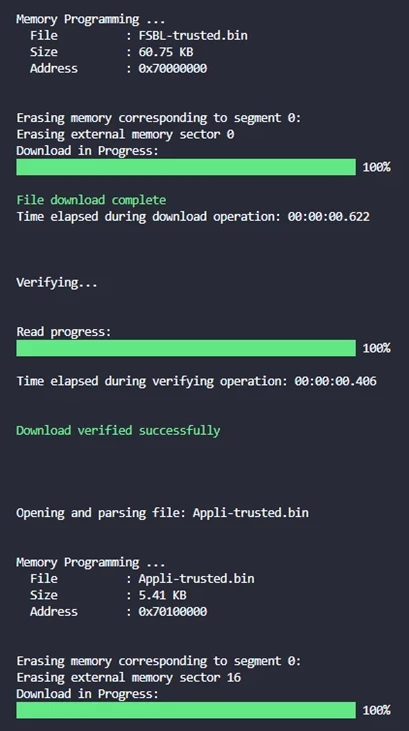
FSBL-trusted.bin and Appli-trusted.bin are flashed into external memory using STM32CubeProgrammer CLI
these are the persistent trusted images used by the MCU boot flow
the imagesAndSymbols command in the debug launch configuration downloads the unsigned FSBL and Application ELF only temporarily for the active debug session
In other words, the debugger download is session-local, while the trusted binaries flashed by the task are the persistent bootable images.
For this reason, the recommended approach is to flash the trusted binaries first using STM32CubeProgrammer CLI, then start the debug session.
Flash using a VS Code task
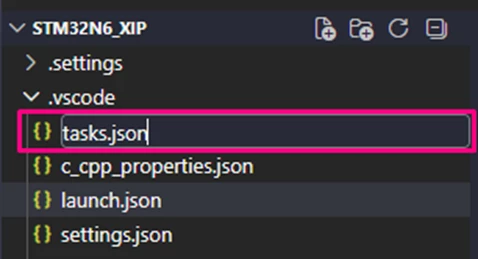
Create the following .vscode/tasks.json file:
{
    "version": "2.0.0",
    "tasks": [
        // =========================================================================
        // This task invokes the STM32CubeProgrammer CLI to program the board.
        // REQUIREMENT: Board must be in DEVBOOT mode (BOOT1=1) for this to succeed.
        // =========================================================================
        {
            "label": "Flash STM32N6 (DEVBOOT)",
            "type": "process",
            "command": "STM32_Programmer_CLI",

            "args": [
                // CONNECTION: Use SWD port and connect 'Under Reset' (UR)
                "-c", "port=SWD", "mode=UR",

                // EXTERNAL LOADER: Required to program the external memory.
                // Ensure this path points to the correct loader for the STM32N6 DK.
                "-el", "C:/Program Files/STMicroelectronics/STM32Cube/STM32CubeProgrammer/bin/ExternalLoader/MX66UW1G45G_STM32N6570-DK.stldr",

                // FLASHING FSBL (First Stage Boot Loader):
                // Using flat binary (.bin) format requires explicit start address (0x70000000).
                "-d", "${workspaceFolder}/FSBL/build/FSBL-trusted.bin", "0x70000000", "-v", // Verify after write

                // FLASHING APPLI (Main Application):
                // Using flat binary (.bin) format requires explicit start address (0x70100000).
                "-d", "${workspaceFolder}/Appli/build/Appli-trusted.bin", "0x70100000", "-v" // Verify after write
            ],
            "problemMatcher": []
        }
    ]
}
7.1 Explanation of the task
Explicit SWD under-reset connection:
The task uses "-c", "port=SWD", "mode=UR". This selects the SWD debug port and connects under reset, which is more robust for this type of low-level secure/XIP flow.
External loader:
The task specifies “-el”, “external loader path”. This loader is required to program the external memory device used by the STM32N6570-DK board.
Flashing FSBL and Application signed binaries:
The task flashes:
FSBL-trusted.bin at address 0x70000000
Appli-trusted.bin at address 0x70100000
The addresses are provided explicitly because the input files are flat .bin images.
This ensures that the binaries are written to the correct locations in external memory.
Running the task
After saving tasks.json, run the task with:
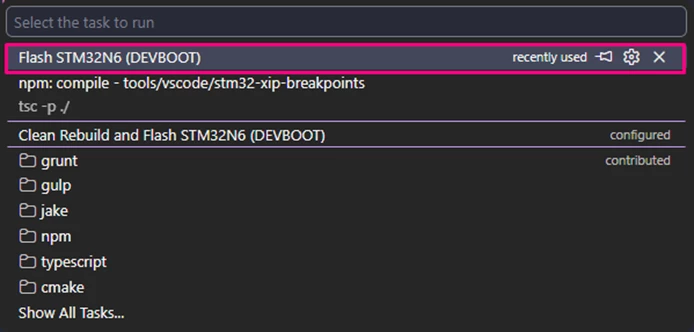
Ctrl+Shift+P → Tasks: Run Task → Flash STM32N6 (DEVBOOT)
This flashes the signed FSBL and application binaries.
Optional use as a pre-launch task
If desired, the flash task can also be called automatically before starting the debugger by uncommenting the preLaunchTask line in launch.json:
"preLaunchTask":"Flash STM32N6 (DEVBOOT)"
If you prefer to manually control flashing and debugging separately, you can leave preLaunchTask commented out and run the flash task only when needed.
8. Start debugging
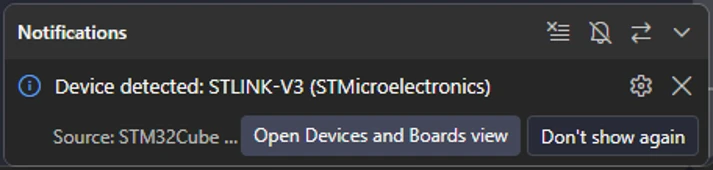
Connect your STM32 board to your PC using the ST-Link debugger.
In VS Code, select the debug configuration you created.
Press F5 or click the green Start Debugging button.
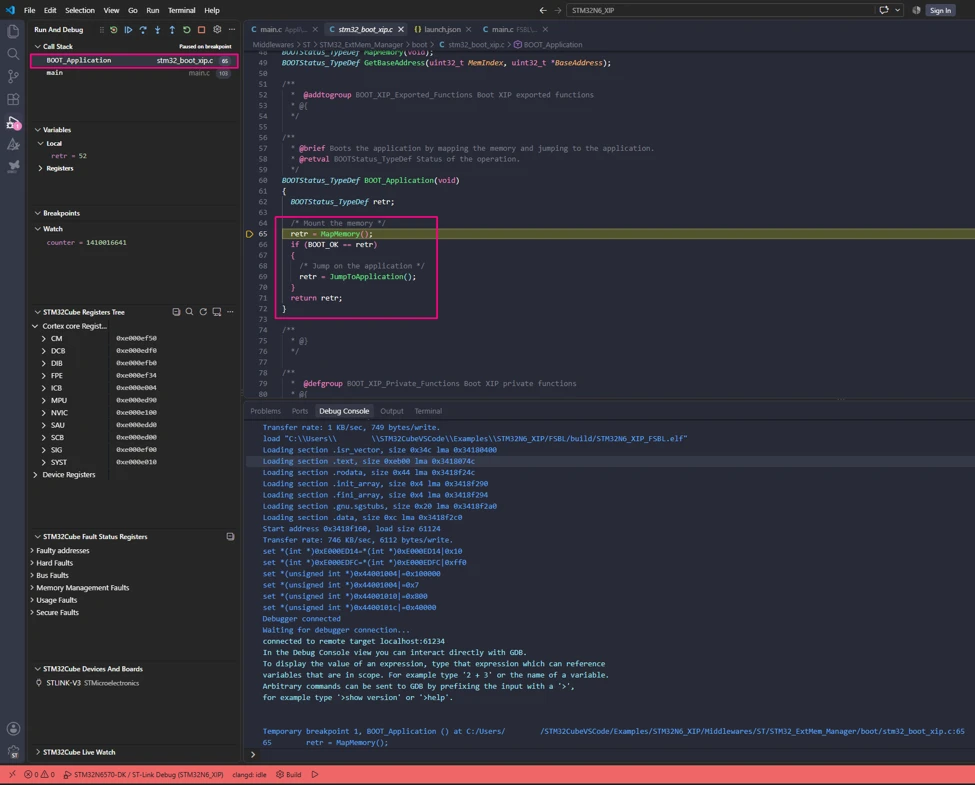
The debugger starts from the FSBL, loads the application symbols, and automatically runs to:
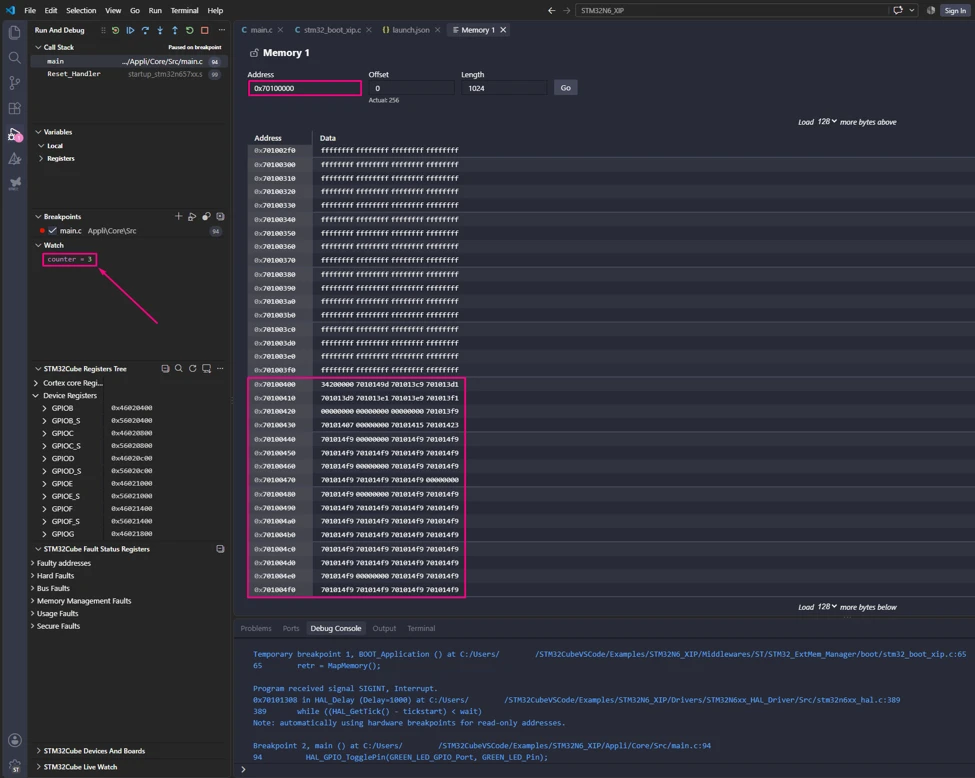
The code starts in the FSBL application running from an address within AXISRAM2. After the code stops here, press [F5]Continue. The green LED should start blinking on the board.
By pausing the code execution, you can confirm that it is running from the external flash by inspecting the function addresses in the call stack. At this stage, all standard debugging features become available, allowing you to:
Set breakpoints.
Step through your program.
Inspect variables, registers, and memory.
View call stacks.
Note: Remember that keeping existing breakpoints between debug sessions can cause failure messages when entering debug mode. If a failure message appears when attempting to enter debug mode, try power cycling the board. For more details on this limitation and possible workarounds, see our related article on How to manage breakpoints in external memory on STM32N6 | Community
Conclusion
By following these steps, you can successfully debug code running on the STM32N6 using VS Code. This tutorial provides a practical approach, covering environment setup, debugger configuration, and validation to ensure a smooth and effective debugging experience.
Nice and detailed tutorial! Bravo! That ‘first’ breakpoint isn’t necessary if you use a simple trick in the Appli main() with a debug flag or a user button.
 BSP_PB_Init (BUTTON_USER1, BUTTON_MODE_GPIO);
 // loop that can be used to catch the application for debug.Set mini to 1, build and flash target as normally.
 // Set BOOT1 switch to the left position, press reset without removing cable.
 // Use the Connect to running debug config to connect, then change mini value from watch.
 // For breakpoints to work they seem to need to be manually changed to ahrdware breakpoint
 static volatile int debugFlag = 1;
 while (debugFlag == 1 && BSP_PB_GetState(BUTTON_USER1) == 0)
 {
 __NOP();
 }
@B.Montanari Thank you for this precise article. I've run into a problem while trying to debug, I just get an error message:
ST-LINK SN : 004400303234510E37333934 ST-LINK FW : V3J16M9 Board : NUCLEO-N657X0-Q Voltage : 3.29V Error: Unable to get core ID Error: Cannot connect to access port 1! If you are trying to connect to a device with TrustZone enabled please try to connect with HotPlug mode. If you are trying to connect to a device which supports Debug Authentication with certificate or password, please open your device using it. Encountered Error when opening C:/Users/zsigm/AppData/Local/stm32cube/bundles/programmer/2.20.0/bin\STM32_Programmer_CLI.exe Error in STM32CubeProgrammer Error finishing flash operation cube is killed by signal SIGTERM
What could be causing this? Is there a way to enable HotPlug mode in the launch.json file?
@B.Montanari current article and this article are outdated by the signing tool "-align" argument while this is updated. Without this argument the EXTMEM_MANAGER header size cannot be reliably configured.
@B.Montanari first of all - it's great that you and others in ST create these articles because the new MCUs with external memories, loaders and security features get very complicate very quickly.
Based on the instructions (and struggles) I have managed to use external Flash loader to program Application into external Flash and write FSBL into MCU internal SRAM with debugger in development boot mode and debug these two programs. I have also succeeded to program FSBL into external Flash (so Boot ROM copies it into SRAM) with STM32CubeProgrammer and launch the application in Flash boot mode (BOOT1 = 0).
Sidenote: It's a pity that STM32CubeProgrammer cannot load the custom .elf with address info that the post-build step creates.
Now I would like to program FSBL and Application into external Flash and start debugging them just like they would run on the real product. I guess it should be possible? So I changed launch.json to program FSBL signed elf image, but ST link fails to program second image with one go. No matter if FSBL or Appli is programmed first, the second image programming always fails with "failed to erase memory". Then I removed application image from launcher and just tried flashing only the signed FSBL and using original FSBL as symbol file. It finishes programming and then gives an error:
set *(int *)0xE000ED14=*(int *)0xE000ED14|0x10
Cannot access memory at address 0xe000ed14
cube is killed by signal SIGTERM
I see the debugger connects in hot-plug mode and makes a software reset. I am not sure what exactly is supposed to happen after programming. I guess debuggers needs to reset the target in order to make boot ROM copy FSBL into SRAM and launch it? But it's a black box from vscode point of view.
I don't want to pollute this topic with logs (no way to attach regular txt files either), so I would like to ask your advice. I would also like to know if it's possible to debug (and program) in flash boot mode (BOOT1 = 0). That brings me to yet another question - I cannot connect with STM32CubeProgrammer in that mode because it tells to do debug authentication (if device supports), but I have not found any such button or feature for that in GUI. And finally - an article explaining how to program the signature and encryption keys into the target would be nice because there's a lot of OTP bytes and only one chance per board to succeed.
Yes, debugging in Flash Boot Mode (BOOT1=0, BOOT0=0) is possible on the STM32N6, but it requires a specific workflow. You cannot rely on the standard "one-click" F5 launch in VS Code for two main reasons:
Flashing Failure: The VS Code debugger (GDB Server) fails to flash the FSBL-trusted.elf file.
Debug Failure:In Flash Boot Mode (BOOT1=0), the BootROM can lock or restrict the debug port, so a normal connect‑and‑reset debug session may fail.
To succeed, you must separate the flashing process from the debugging process and manually re-open the debug port in your firmware.
Why it was failing
"Failed to erase memory": This error occurs because the ST-LINK GDB Server (used by VS Code's launch.json) fails to correctly parse or flash the signed FSBL-trusted.elf. The GDB Server struggles with the specific headers of the trusted ELF or loses the External Loader context when trying to program it, leading to a failure before the write even begins.
"Cannot access memory at 0xe000ed14": This error is a direct side effect of the GDB Server failing to handle the signed FSBL-trusted.elf. When the GDB Server attempts to process the signed binary and fails, it loses synchronization with the debug probe or leaves the session in an undefined state. As a result, subsequent commands fail with a generic "Cannot access memory" error, even though the hardware itself is in an open (DEVBOOT) state.
"Debug Authentication":When switching to Flash Boot Mode (BOOT1=0, BOOT0=0), the BootROM enforces debug restrictions. If no debug authentication or explicit unlock is performed, both VS Code and STM32CubeProgrammer can show a Debug Authentication error and fail to connect or reset.
Solution
Step A: Modify FSBL to re-enable Debug
Since Flash Boot mode can restrict debug, your FSBL should explicitly re‑allow debug access at startup.
At the beginning of main() (or very early in FSBL init), you can add this:
/* Unlock BSEC Access Port */
BSEC->AP_UNLOCK = 0xB4;

/* Enable Non-Secure and Secure Debug (Mimics DEVBOOT state) */
BSEC->DBGCR = 0xB451B400;

/* Optional: Blink an LED here to visually confirm FSBL is running */
This way, when the BootROM has finished authenticating and jumps into FSBL, your FSBL “reopens” the debug port, making Hotplug attach feasible in Flash Boot mode.
Step B: Flash using a VS Code Task (DEVBOOT only)
Flashing signed images via the ST‑LINK GDB server in VS Code is fragile in this scenario, especially with external flash and trusted ELFs. A more robust approach is to:
Put the board inDEVBOOT (BOOT1=1),
UseSTM32_Programmer_CLIwith the external loader and explicit addresses,
And run that via aVS Code task.
Example .vscode/tasks.json:
{
 "version": "2.0.0",
 "tasks": [
 // =========================================================================
 // This task invokes the STM32CubeProgrammer CLI to program the board.
 // REQUIREMENT: Board must be in DEVBOOT mode (BOOT1=1) for this to succeed.
 // =========================================================================
 {
 "label": "Flash STM32N6 (DEVBOOT)",
 "type": "process",
 "command": "STM32_Programmer_CLI",

 // AUTOMATION: Automatically runs the "Clean Rebuild" task first.
 // If the rebuild fails, this flash command will not execute.
 "dependsOn": [
 "CMake: clean rebuild"
 ],

 "args": [
 // CONNECTION: Use SWD port and connect 'Under Reset' (UR)
 "-c", "port=SWD", "mode=UR",

 // EXTERNAL LOADER: Required to program the external Octal-SPI/HyperFlash.
 // Ensure this path points to the correct loader for the STM32N6 DK.
 "-el", "C:/Program Files/STMicroelectronics/STM32Cube/STM32CubeProgrammer/bin/ExternalLoader/MX66UW1G45G_STM32N6570-DK.stldr",

 // FLASHING FSBL (First Stage Boot Loader):
 // Using flat binary (.bin) format requires explicit start address (0x70000000).
 "-d", "${workspaceFolder}/FSBL/build/FSBL-trusted.bin", "0x70000000", "-v", // Verify after write

 // FLASHING APPLI (Main Application):
 // Using flat binary (.bin) format requires explicit start address (0x70100000).
 "-d", "${workspaceFolder}/Appli/build/Appli-trusted.bin", "0x70100000", "-v" // Verify after write
 ],
 "problemMatcher": []
 }
 ]
}
After saving tasks.json, run it via:
Ctrl+Shift+P → Tasks: Run Task → Flash STM32N6 (DEVBOOT)
Step C: Debug using Hotplug (Attach-like)
Once the images are flashed and verified:
Switch the board to Flash Boot mode (BOOT1=0, BOOT0=0).
Power cycle the board so that the BootROM authenticates the FSBL and jumps into it.
FSBL runs, executes your debug‑unlock sequence, then continues.
Now you want a launch configuration that only attaches and does not reset the target or try to re‑flash anything.
Example .vscode/launch.json:
{
 "version": "0.2.0",
 "configurations": [
 // ====================================================================
 // CONFIGURATION: HOTPLUG / ATTACH MODE
 // Use this when the board is in FLASHBOOT (BOOT1=0).
 // It connects to the running target without resetting it, allowing you to debug in
 //FLASHBOOT mode
 // ====================================================================
 {
 "name": "STM32N6-DK Hotplug/Debug",
 "type": "stlinkgdbtarget",
 "request": "launch", // logic acts as 'attach' due to serverReset: None
 "origin": "snippet",
 "deviceName": "STM32N657",
 "deviceCore": "Cortex-M55",

 // CRITICAL: Tells the debugger NOT to reset the chip upon connection.
 // This preserves the state set by the Boot ROM and your FSBL unlock code.
 "serverReset": "None",

 "cwd": "${workspaceFolder}",
 "svdPath": "C:/ST/STM32CubeCLT_1.20.0/STMicroelectronics_CMSIS_SVD/STM32N657.svd",

 // SYMBOLS ONLY: notice 'imageFileName' is missing.
 // This ensures VS Code knows the variable names/line numbers
 // but DOES NOT attempt to flash the code (which would fail in Secure Boot).
 "imagesAndSymbols": [
 {
 "symbolFileName": "${workspaceFolder}/Appli/build/STM32N6_ExecuteInPlace_Appli.elf"
 },
 {
 "symbolFileName": "${workspaceFolder}/FSBL/build/STM32N6_ExecuteInPlace_FSBL.elf"
 }
 ],

 // LOADER WORKAROUND: The extension requires this block to be present.
 // We set 'initialize: false' to prevent the debugger from trying to
 // configure the external flash (which runs safely in the background).
 "serverExtLoader": [
 {
 "loader": "C:/Program Files/STMicroelectronics/STM32Cube/STM32CubeProgrammer/bin/ExternalLoader/MX66UW1G45G_STM32N6570-DK.stldr",
 "initialize": false
 }
 ]
 }
 ]
}
With this setup:
VS Code will not reprogram anything.
It will attempt to attach to the running core, leaving the FSBL‑based debug unlock logic in place.
Once attached, you can set breakpoints in FSBL and Appli (both symbol files are loaded).
The Workflow Steps
Flash in DEV Mode:
Set Switch to DEVBOOT mode (BOOT1=1).
Run Task: "Flash STM32N6 (DEVBOOT)".
Result:FSBL-trusted.bin and Appli-trusted.bin are correctly written to External Flash.
Result: Debugging with FLASHBOOT mode (BOOT1=0, BOOT0=0) is now possible.
Questions
Q: Is it possible to debug (and program) in Flash boot mode (BOOT1 = 0)?
Debug:Yes, but only if your FSBL manually unlocks the BSEC registers as shown above.
Program:Not easily via standard tools. Always program in DEVBOOT (BOOT1 = 1), then switch modes to test.
Q: I cannot connect with STM32CubeProgrammer in that mode…
Without FSBL re‑enabling debug, that is expected. After you flash a FSBL that reopens debug, and once it is running, you can use Hotplug/attach from STM32CubeProgrammer as well.
Q: How do I program signature and encryption keys (OTP)?
We do not have a specific tutorial for programming these exact keys, but we are working to improve our documentation in this area and plan to provide more detailed application notes and examples in future releases.
Hi @B.Montanari Thanks for the very helpful guide.
Unfourtunately I'm running into two issues: 1. I'm running into the same issue @Mikk Leini ran into. The flashing just doesn't work after the first *.elf has been downloaded to the N6. @Victor_Aliaga answer is very helpful but the process described is very cumbersome... Your guide must have worked at one point, so why did it work than but doesn't work anymore?
2. I'm using RTOS and when setting everything up as described, the RTOS Proxy will be started with "PROXY_ELF_OBJECT=undefined", disabling debugging the RTOS. Do you have an example on how to debug RTOS on the N6 with VS Code, similarly to this example: https://community.st.com/t5/stm32-mcus/how-to-use-freertos-with-stm32n6/ta-p/805334
Thank you very much for this article. It helped me set up VSCode for the STM32N6 Discovery board and also for the Nucleo version of it. I can build the appli and FSBL using the updated CMakeLists and I can also flash them manually with the programmer. However, if I try to use VSCode, I end up with the following error:
bound doStepSettingsValidation Failed: Core not found: run "Setup STM32Cube project(s)" command or verify "deviceCore" attribute
I made the changes to the launch.js but it does not help.
{
"version": "0.2.0",
"configurations": [
{
"type": "stlinkgdbtarget",
"request": "launch",
"name": "STM326570-DK Debug",
"origin": "snippet",
"cwd": "${workspaceFolder}",
"preBuild": "${command:st-stm32-ide-debug-launch.build}",
"runEntry": "BOOT_Application", // Set in BOOT_Application
"svdPath": "/home/xx/Apps/STMicroelectronics/STM32Cube/STM32CubeCLT/STMicroelectronics_CMSIS_SVD/STM32N657.svd", // Replace with your .svd path
"imagesAndSymbols": [
{
"symbolFileName": "${workspaceFolder}/Appli/build/VSCODE_DK_Appli.elf", // Replace this with your path and your_Appli.elf symbol
"imageFileName": "${workspaceFolder}/Appli/build/Appli-trusted.elf",
},

{
"symbolFileName": "${workspaceFolder}/FSBL/build/VSCODE_DK_FSBL.elf", // Replace this with your path and your_FSBL.elf symbol
"imageFileName": "${workspaceFolder}/FSBL/build/VSCODE_DK_FSBL.elf", // Replace this with your path and your_FSBL.elf image
}
],
"serverExtLoader": [
{
"loader": "/home/xx/Apps/STMicroelectronics/STM32Cube/STM32CubeProgrammer/bin/ExternalLoader/MX66UW1G45G_STM32N6570-DK.stldr", // Replace with your external loader path
"initialize": false
}
]
}
]
}
I have of course also done the 'Setup STM32Cube projects' steps. However I do not know what is meant with 'deviceCore Attributes'.
Do you have any hints on what i could have done wrong?