


How to use XSPI external flash memory to protect data using MCE
Introduction
External memories are widely used in embedded systems to extend storage capabilities, and protection mechanisms for data stored in external memory are also important to secure sensitive data. To address the protection requirements of embedded applications, STM32 devices provide hardware cryptographic support through an integrated encryption and decryption peripheral in the MCU.
1. Project overview
This project illustrates how to use MCE to encrypt and decrypt the data stored in external NOR flash memory. If you want to have the edited files at hand immediately, then you can download the extractable file attached at the bottom of the article.
2. Prerequisites
Hardware
Software
- STM32CubeMX version 6.17.0
- STM32CubeIDE version: 2.1.1
3. Steps
This article is based on the knowledge article “How to configure the external flash memory MX66UW1G45G on the STM32H7S78-DK via XSPI interface”. It provides a practical example of configuring the MX66UW1G45G external NOR flash memory on the STM32H7S78-DK via XSPI2. It sets the memory in Octal DTR mode, writes a string to NOR flash in indirect mode, and then switches XSPI to memory-mapped mode for readback verification. For the STM32CubeMX configuration and the STM32CubeIDE code related to these steps, refer to that article. In this example, only the MCE configuration is added to encrypt and decrypt the data stored in external memory.
Step 1: Download the project
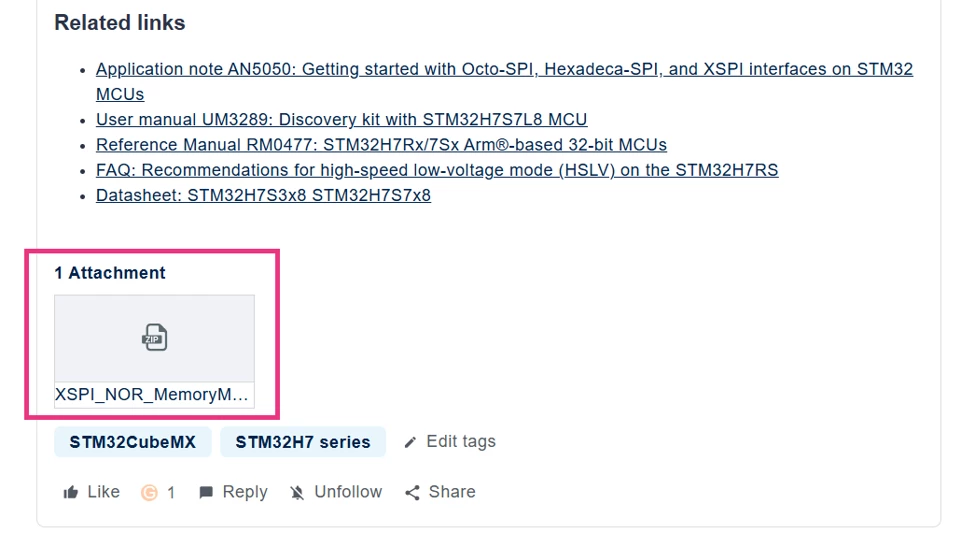
Download the project from the attachment available at the end of the article: “How to configure the external flash memory MX66UW1G45G on the STM32H7S78-DK via XSPI interface”, as shown in the screenshot below.
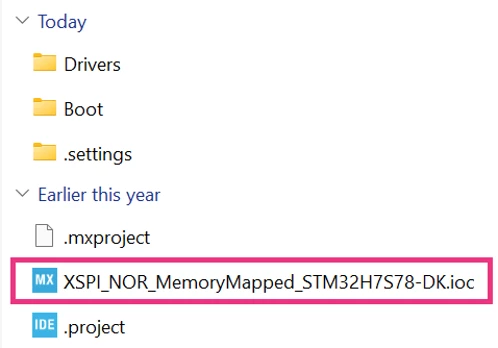
Step 2: Extract the file and open the “.ioc” file
Step 3: MCE mode, configuration and generate code
Activate MCE2 as shown in the screenshot below.
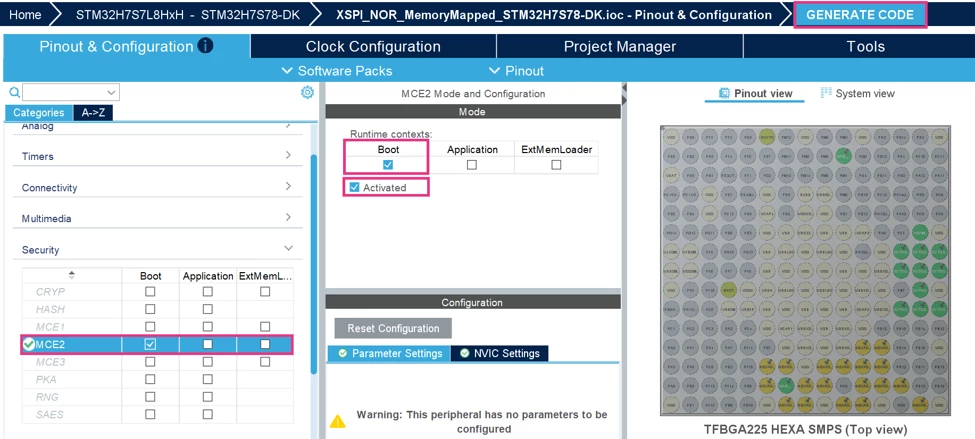
Note: To understand the concept of MCE and get more information, refer to this application note: “How to use MCE for encryption/decryption on STM32 MCUs” and consult RM0477, specifically section “39 Memory cipher engine (MCE)”.
Step 4: Edit main.c
After generating the project with STM32CubeMX, the MCE configuration must be added to main.c to encrypt and decrypt the data stored in external flash memory. In this project, MCE2 is configured in Noekeon Block Cipher mode.
- In the USER CODE BEGIN PV, insert these private variables declarations:
/* MCE configuration structures */
MCE_RegionConfigTypeDef RegionConfig;
MCE_RegionConfigTypeDef RegionConfig_npriv;
MCE_NoekeonConfigTypeDef NoekeonConfig;
MCE_RegionConfigTypeDef config;
/* Cryptographic key used by the MCE Noekeon engine */
uint32_t Key[4][4] = {
    {0x71234567, 0x89ABCDEF, 0x71234567, 0x89ABCDEF},
    {0xEDCBA987, 0x6543210F, 0xEDCBA987, 0x6543210F},
    {0x23456789, 0xABCDEF01, 0x23456789, 0xABCDEF01},
    {0xCBA98765, 0x43210FED, 0xCBA98765, 0x43210FED}
};- In the USER CODE BEGIN 2, insert the following code:
/*MCE configuration---------------------------------------- */
  /* Select the Noekeon master key --------------------------*/
    NoekeonConfig.KeyType = MCE_USE_MASTERKEYS;
    NoekeonConfig.pKey    = Key[2];
    /* Apply the Noekeon configuration-------------------- */
    if (HAL_MCE_ConfigNoekeon(&hmce2, &NoekeonConfig) != HAL_OK)
    {
      Error_Handler();
    }
    /* Define the flash memory region protected by MCE */
    RegionConfig.Mode             = MCE_BLOCK_CIPHER;
    RegionConfig.ContextID        = MCE_NO_CONTEXT;
    RegionConfig.StartAddress     = 0x70000000;
    RegionConfig.EndAddress       = 0x7FFFFFFF;
    RegionConfig.PrivilegedAccess = MCE_REGION_NPRIV;
    RegionConfig.AccessMode       = MCE_REGION_READWRITE;
    /* Apply the MCE region configuration */
    if (HAL_MCE_ConfigRegion(&hmce2, 0, &RegionConfig) != HAL_OK)
    {
      Error_Handler();
    }
    /* Disable the MCE region */
    if (HAL_MCE_DisableRegion(&hmce2, 0) != HAL_OK)
    {
      Error_Handler();
    }
Note: When the MCE is used together with XSPI, it is mandatory to access the flash memory through the memory-mapped mode of the flash memory controller. Therefore, the MCE2 configuration must be applied after enabling memory-mapped mode and before reading the RX buffer and performing the comparison.
Step 5: Compile and flash
- Click the [build] button.
- Click the [debug] button.
Step 6: Debug and verification
To view the debug results of the variables declared in the code in detail (aTxBuffer, aRxBuffer, xspi_ker_freq, and SystemCoreClock), refer to this article: “How to configure the external flash memory MX66UW1G45G on the STM32H7S78-DK via XSPI interface”.
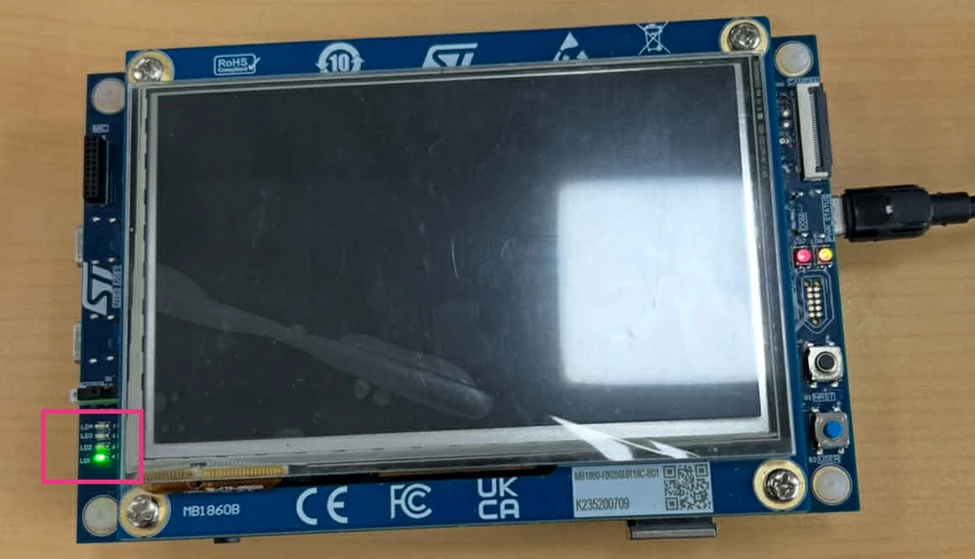
In addition, the result is visible on the board: The green LED turns on. This confirms that the data written to the external flash memory is read back correctly. Also, the MCE2 encryption and decryption mechanism works properly, as shown in the screenshot below.
For more verification:
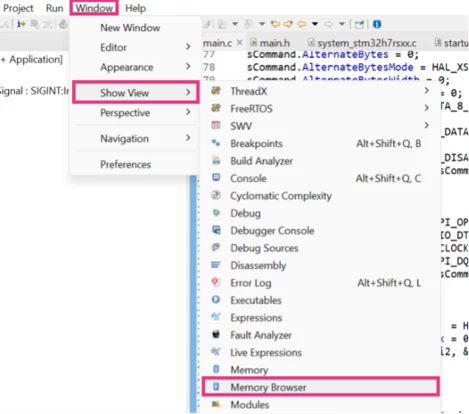
- Click on [Window], then select [Memory Browser]. Enter the corresponding address of the memory-mapped external flash, accessed through XSPI2. The address is “0x70000000”, as shown in the screenshot below.

Set breakpoints on the following instructions to pause execution at specific stages to verify external flash access and MCE configuration:
- if (HAL_XSPI_MemoryMapped(&hxspi2, &sMemMappedCfg) != HAL_OK),
click [Resume]. Then, use [Step Over] to check that the external flash memory is correctly accessible in memory-mapped mode. Confirm that the expected data is present at the mapped address.
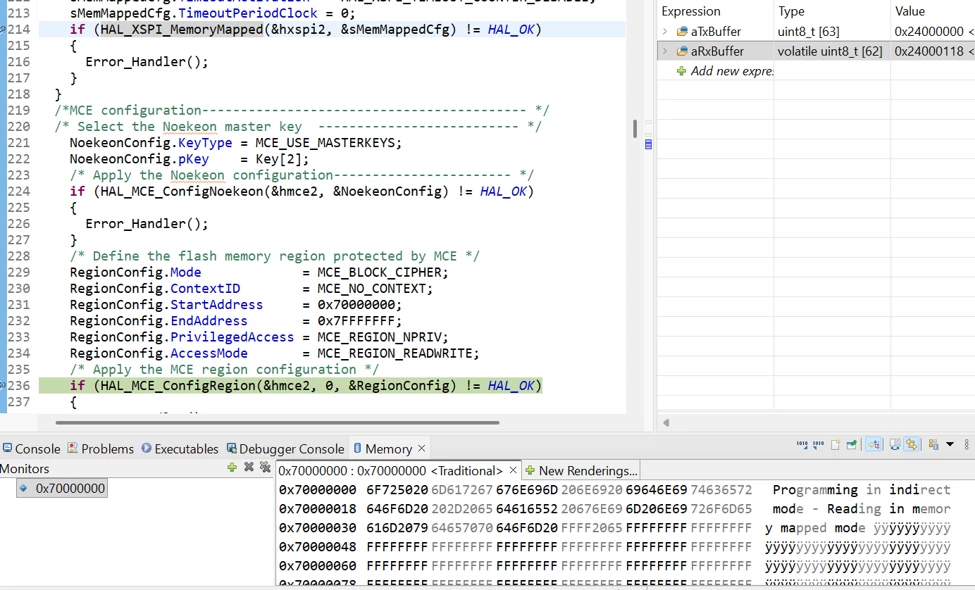
Here, it can be observed that the raw data stored in external memory becomes directly accessible and visible at this address once the application enters memory-mapped mode.
- if (HAL_MCE_ConfigRegion(&hmce2, 0, &RegionConfig) != HAL_OK), click [Resume]. Then use [Step Over] to verify the encrypted region managed by the MCE peripheral, as shown in the screenshot below.
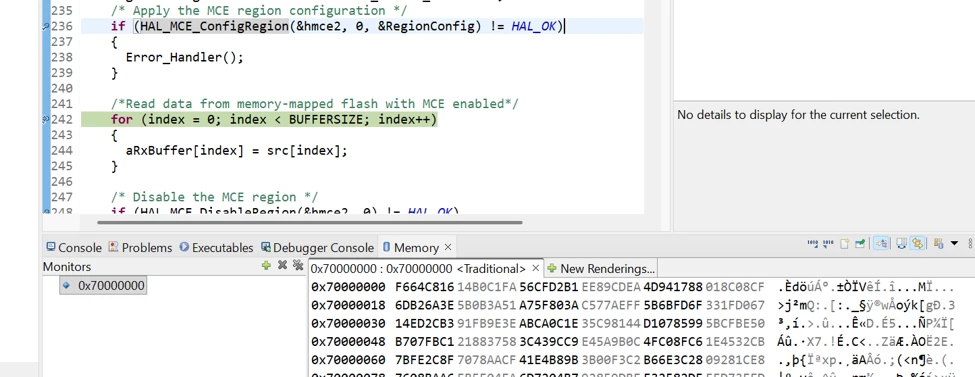
Once the MCE region is configured, the data stored in the protected memory area is no longer handled as plain text. This confirms that the encryption mechanism managed by the MCE is correctly applied.
• if (HAL_MCE_DisableRegion(&hmce2, 0) != HAL_OK), click [Resume]. Then, use [Step Over] to verify that the encrypted region is returned to clear data.
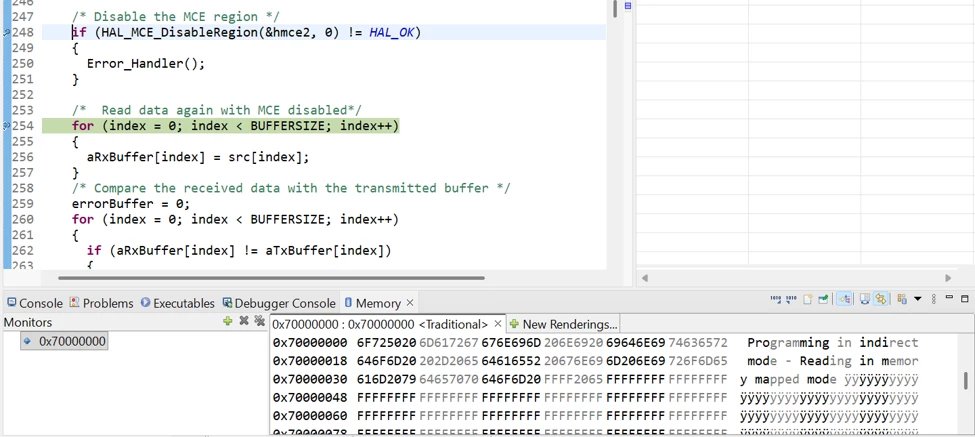
Once the MCE region is disabled, the protected memory content returns to clear data. This confirms that the encryption mechanism is no longer applied.
After following this guide, it is now possible to configure the MX66UW1G45G external NOR flash on the STM32H7S78-DK through XSPI2. Also, store and read back a buffer using memory-mapped access and protect the data with the MCE2 peripheral.
Conclusion
After following this guide, it is now possible to configure the MX66UW1G45G external NOR flash on the STM32H7S78-DK through XSPI2. Also, store and read back a buffer using memory-mapped access and protect the data with the MCE2 peripheral.
Related links
- Knowledge article: How to configure the external flash memory MX66UW1G45G on the STM32H7S78-DK via XSPI interface
- Application note AN6088: How to use MCE for encryption/decryption on STM32 MCUs
- Knowledge article: STM32CubeIDE: How to debug an STM32H7Rx/Sx project without flashing boot every time