

How to port a Keil® MDK project to Arm® Keil® Studio and execute it
Summary
This article describes how to port a Keil® MDK example project to Arm® Keil® Studio in VS Code and run it on an STM32 device.
This article covers the following main points:
- Install the Arm® Keil® Studio extensions in VS Code
- Convert a Keil® μVision® project to a CMSIS-Solution project
- Build and debug the converted project on STM32 NUCLEO-WBA65RI
Introduction
Keil® MDK's μVision® integrated development environment (IDE) is a mature, Windows-only toolchain for Arm Cortex®-M development. Many embedded teams want to move to VS Code for a lighter-weight, cross-platform, and extensible development environment, but converting an existing Keil® project manually is time-consuming and error-prone. Arm® Keil® Studio brings the Keil® MDK tool chain into VS Code and includes a conversion tool that automatically converts an existing μVision® project to a CMSIS-Solution project. As a result, the existing compiler settings, linker file, include paths, and preprocessor definitions do not need manual re-creation.
This article describes how to port an existing Keil microcontroller development kit (MDK) example project to Arm® Keil® Studio in VS Code. It covers the complete workflow: convert the project configuration, build the application, and debug it on STM32 NUCLEO-WBA65RI. This article is intended for embedded developers who already have a working Keil® MDK project and want to move to a VS Code-based workflow. The article applies whether they are new to Arm® Keil® Studio or modernizing an existing tool chain.
The same conversion, build, and debug steps apply to any STM32 system-on-chip (SoC) that Arm® Keil® Studio supports, not only to the STM32WBA series. This article uses STM32 NUCLEO-WBA65RI as a working example to demonstrate the workflow.
1. Software prerequisites
To port a Keil® example to Arm® Keil® Studio and build and debug it on STM32 NUCLEO-WBA65RI, ensure that the development environment includes the following software components:
- Visual Studio Code (VS Code).
- Keil® MDK, with the existing μVision® project (.uvprojx) to be ported.
- Arm® Keil® Studio Pack extension for VS Code. Installing this extension also installs the Arm CMSIS-Solution, Arm Tools Environment Manager, and Arm CMSIS Debugger extensions, which are required for conversion, building, and debugging. CMSIS stands for common microcontroller software interface standard.
2. Hardware prerequisites
To build, program, and debug the GPIO_IOToggle example application, the following board is required:
- STM32 NUCLEO-WBA65RI.
3. Installation
Setting up Arm Keil Studio requires installing a small number of extensions in VS Code. Complete the following steps:
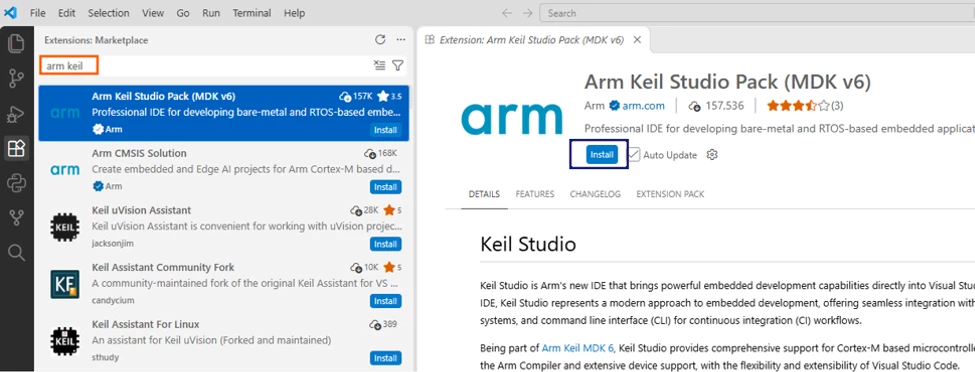
- In the Extensions view, search for “arm keil”, and install the Arm Keil Studio Pack (MDK v6) extension.
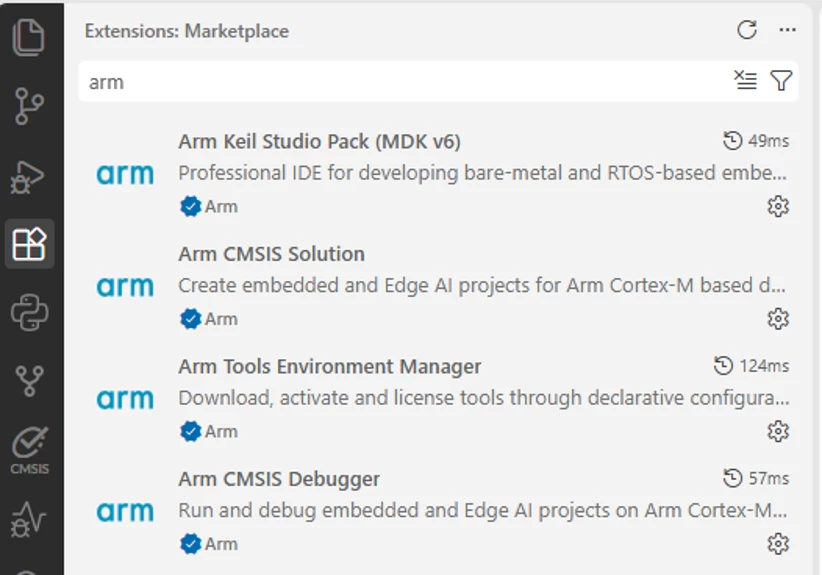
- Reload VS Code to activate the extension. After the reload, the Extensions view lists the extensions that the Arm Keil Studio Pack installs: Arm Keil Studio Pack, Arm CMSIS Solution, Arm Tools Environment Manager, and Arm CMSIS Debugger.
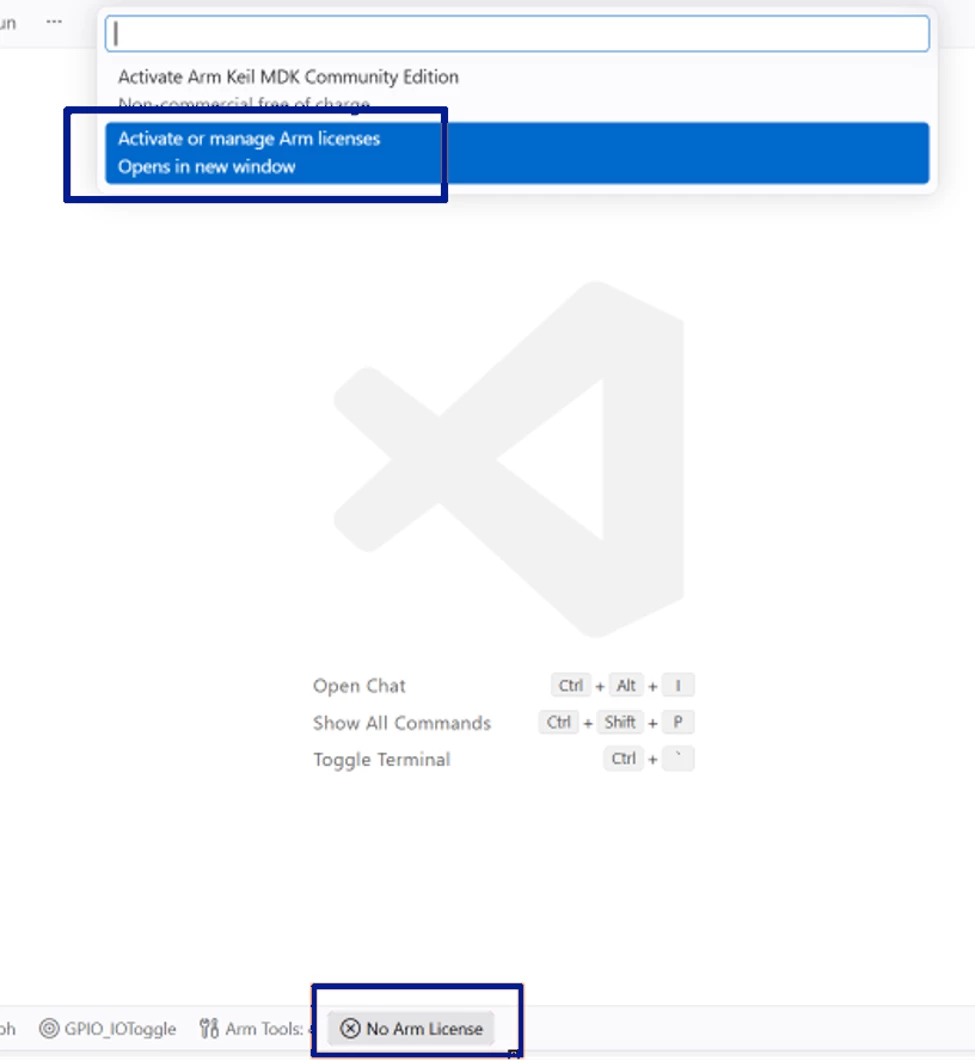
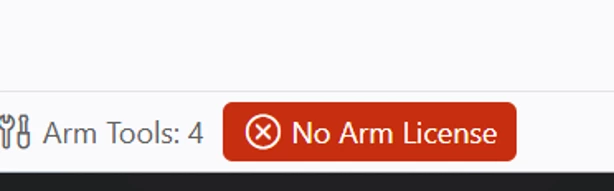
- If No Arm License appears, select the same tab, then select Activate or manage Arm licenses. Activate the Arm tools license in the same way as an MDK Keil® license.
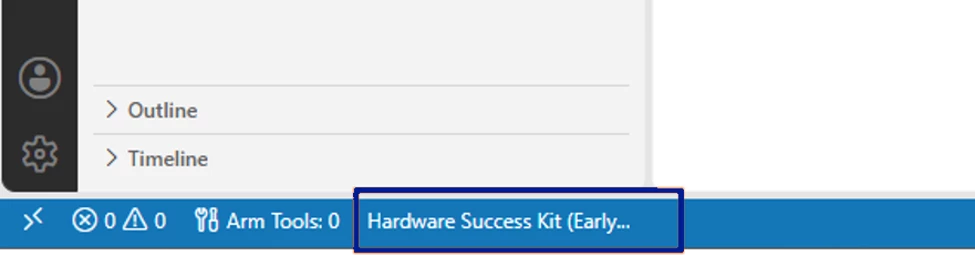
- Once license activation is complete, the screen appears as shown in the following screenshot.
4. Porting the project
Converting the Keil® project and building and debugging it in Arm Keil Studio requires the following steps.
- In Keil® μVision®, open the project file (GPIO_IOToggle.uvprojx) for the GPIO_IOToggle example and review the existing configuration. This includes the compiler settings, linker file, include paths, and preprocessor definitions, to confirm that they are all correct before migrating the project to Arm Keil Studio
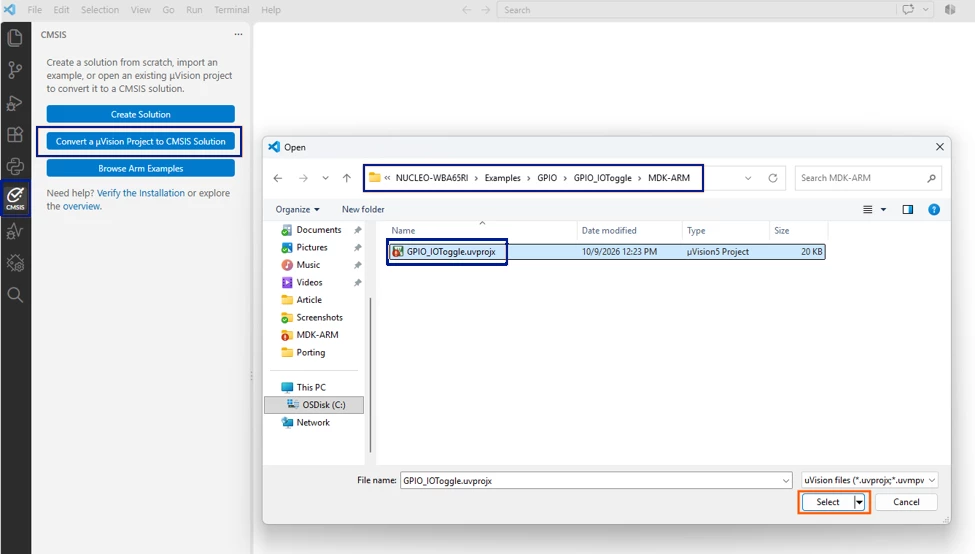
- In VS Code, click the CMSIS tab, and click Convert a μVision® Project to CMSIS Solution. In the dialog box, browse to the .uvprojx path of the Keil® project, and select the project to convert.
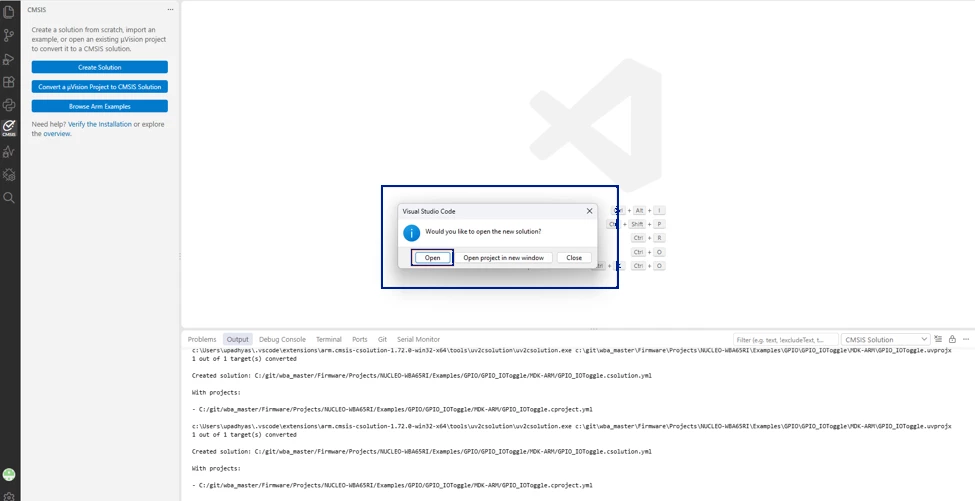
- After the conversion completes, the Output panel reports that the target was converted, and a prompt asks whether to open the new solution. Click Open.
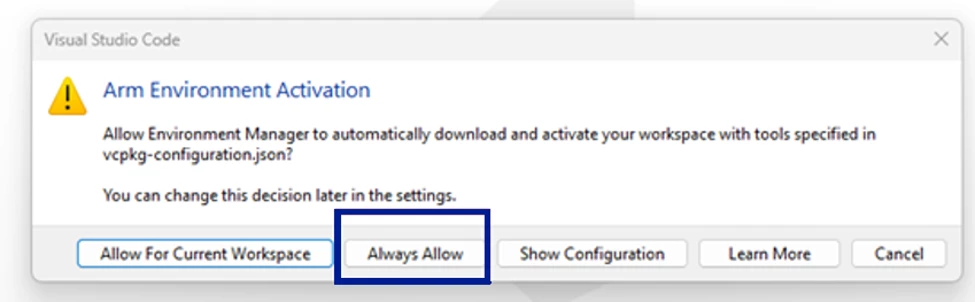
- A dialog box asks for permission to activate the Arm environment. Click Always Allow to let Environment Manager automatically download and activate the tools specified in vcpkg-configuration.json.
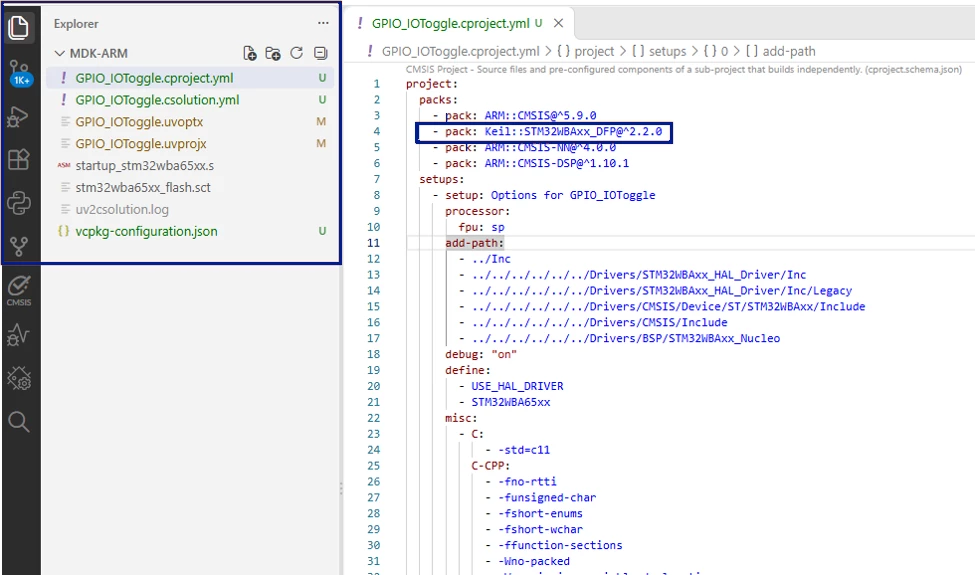
- The converted project opens in VS Code, showing the generated CMSIS-Solution files, such as .cproject.yml and .csolution.yml, under MDK-ARM. If more than one Keil® device pack version is installed, confirm that the correct pack (for example, Keil::STM32WBAxx_DFP) is selected during conversion to avoid compatibility issues.
-
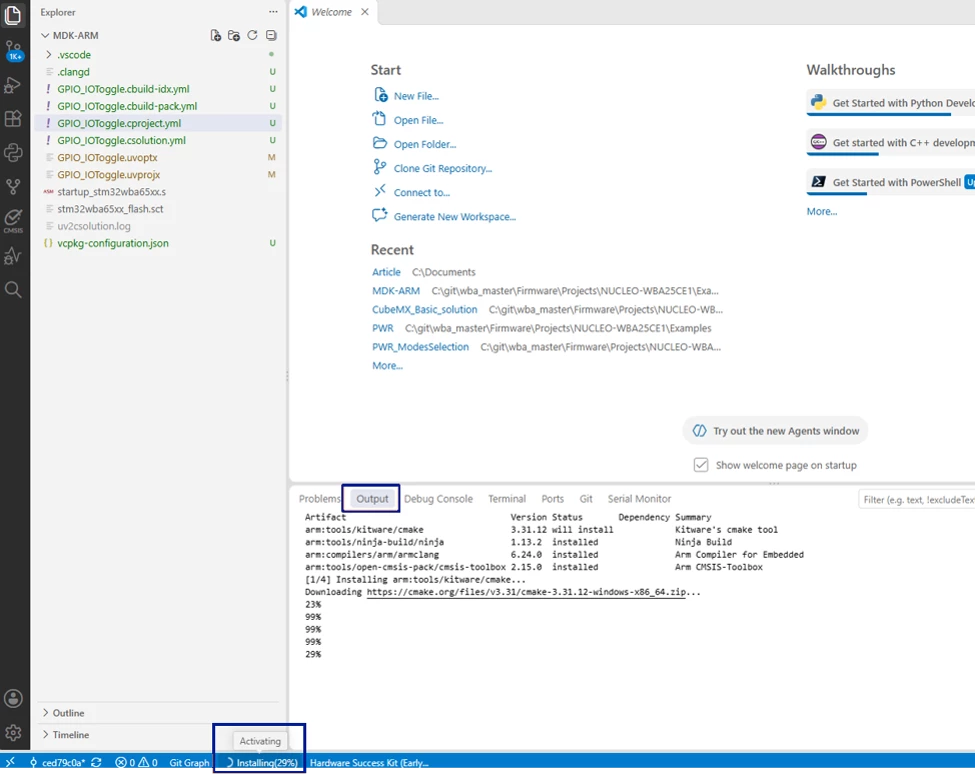
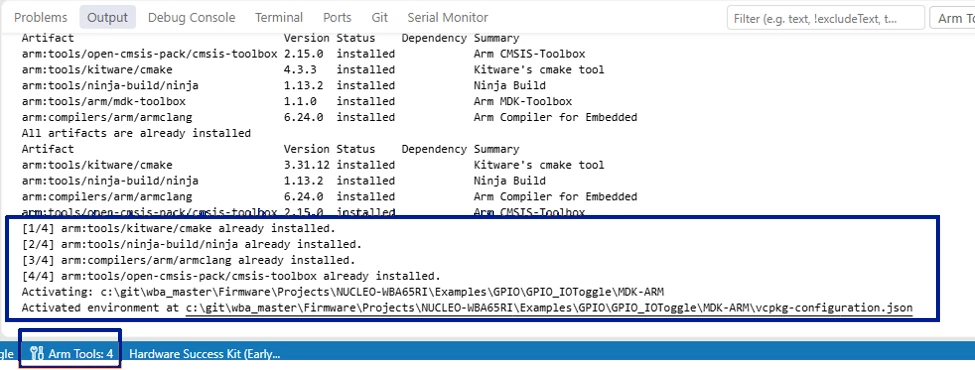
The first time the Arm tools are installed, allow a few minutes for the setup to complete. Before building or debugging the project, confirm in the Output panel that the installation finishes successfully. To review the logs, select Installing and check the logs in the Output window, as highlighted in the screenshot below.
-
If the red-highlighted message "No Arm License" appears, after tool activation, go to installation steps 3 and 4.
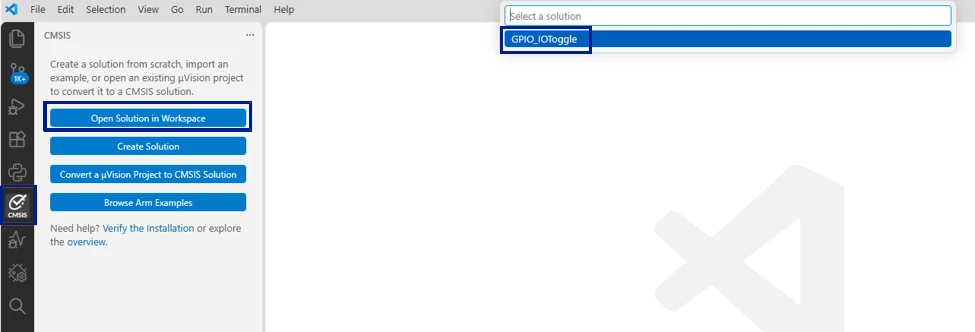
- In the CMSIS tab, click Open Solution in Workspace, and select the GPIO_IOToggle project.
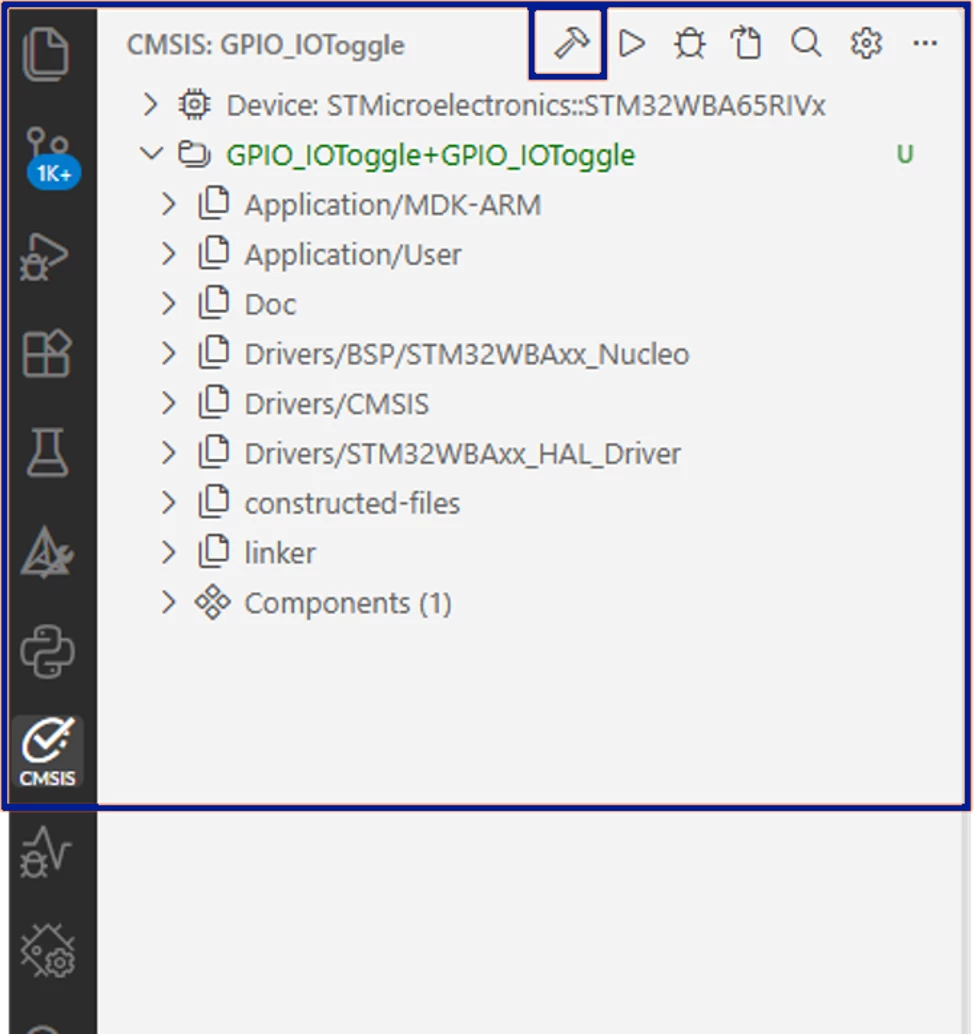
- In the CMSIS view, click the build icon at the top of the panel to build the project.
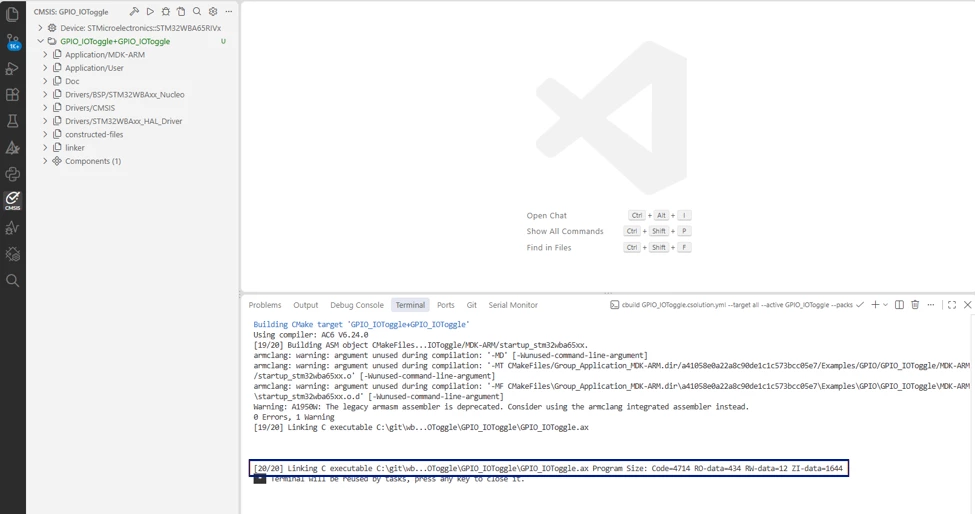
- Wait for the build to complete. The output panel reports the build result, including the program size and any errors or warnings.
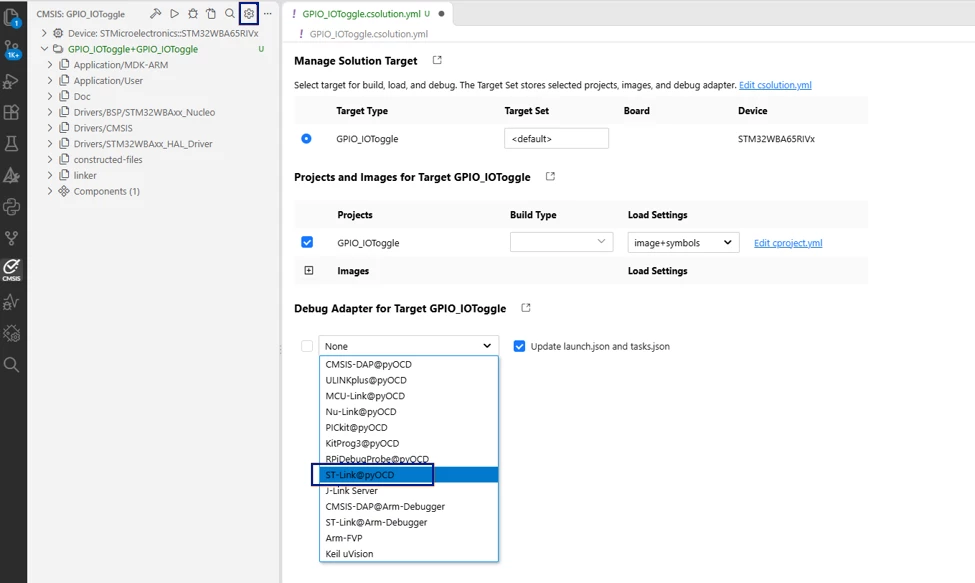
- To configure debugging, click the settings (gear) icon, and select the appropriate debug adapter, for example ST-Link@pyOCD, for the project. Save the file to apply the configuration.
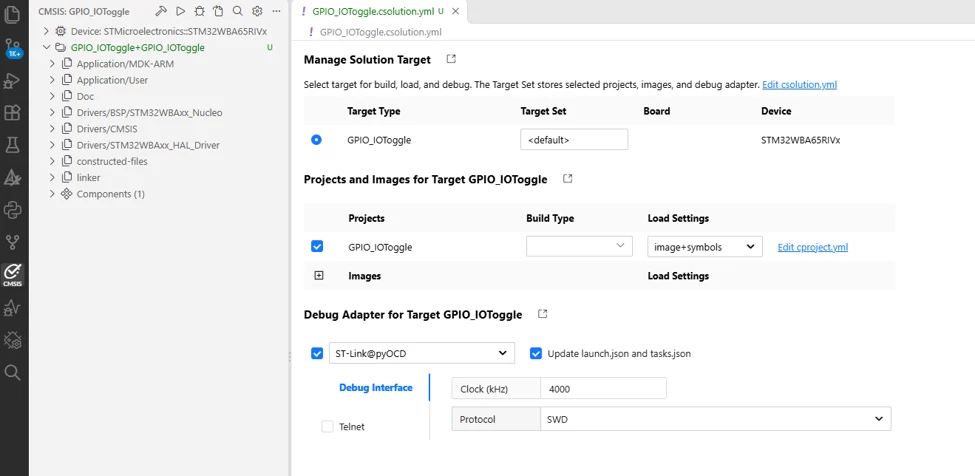
- Click the run icon in the CMSIS view to start debugging the project.
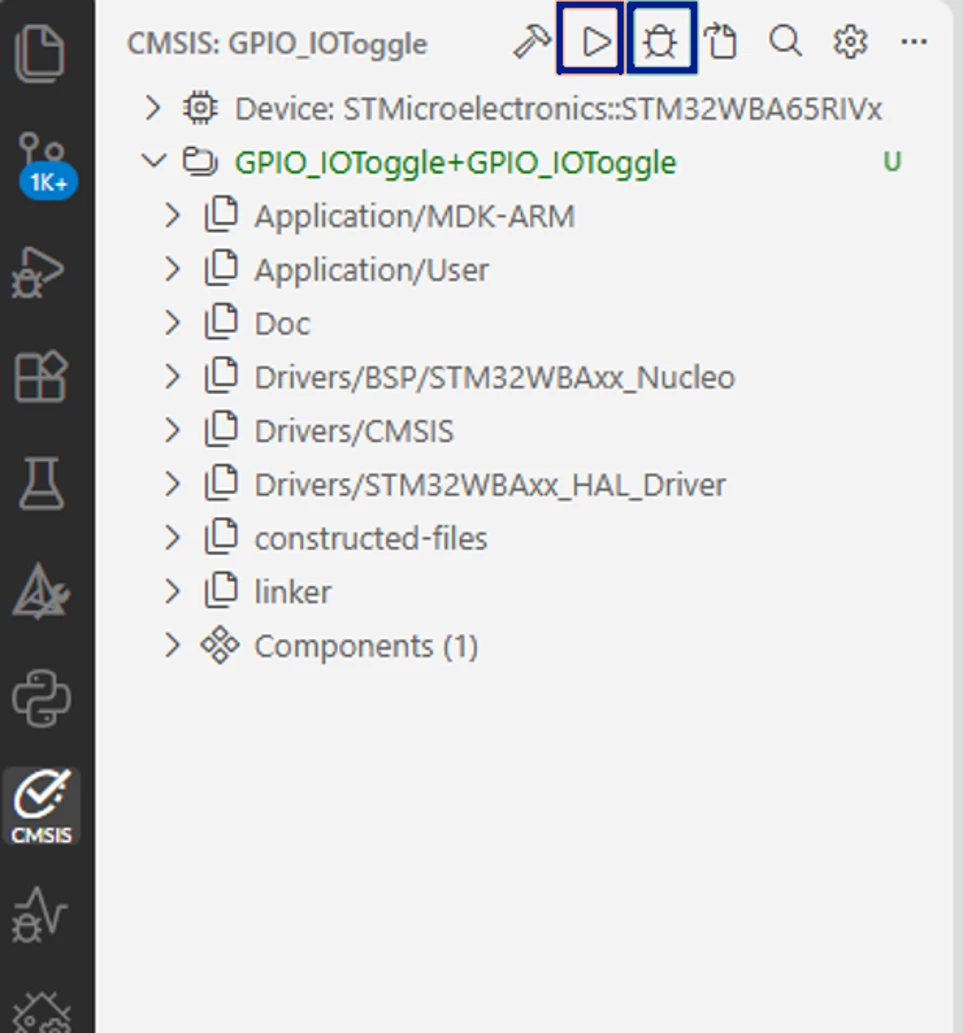
- Set breakpoints, run the debugger, and inspect variables as needed.
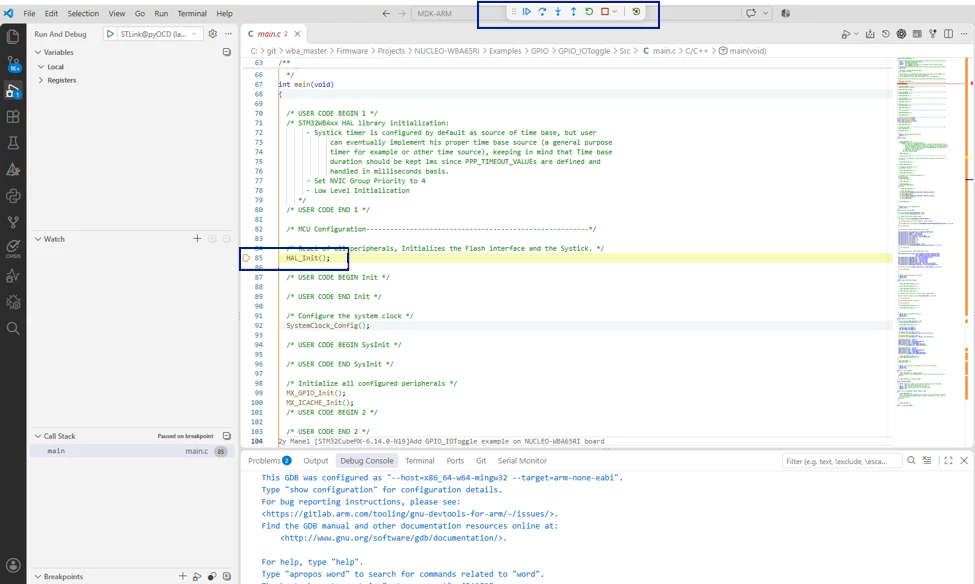
5. Result
The build output in the Output panel reports 0 errors and the generated program size. This result confirms that the converted GPIO_IOToggle project builds correctly in Arm® Keil® Studio. When the debug session starts, the debugger connects to STM32 NUCLEO-WBA65RI through STLINK and stops at the breakpoint set in main.c. When the breakpoint is removed and the application runs freely, the GPIO_IOToggle example toggles the user LED on the board. This behavior confirms that the ported application behaves the same way as the original Keil project.
Conclusion
By completing these steps, the user converts a Keil® MDK example project to a CMSIS-Solution project and then builds and debugs it in Arm® Keil® Studio within VS Code on STM32 NUCLEO-WBA65RI. The same workflow applies to other Keil® example projects.